Introduction
How To Add Arlo Camera: Arlo cameras are a popular choice for home security systems due to their ease of use and advanced features. Whether you are a homeowner looking to enhance the security of your property or a business owner wanting to monitor your premises, adding an Arlo camera to your setup can provide you with peace of mind and increased protection.
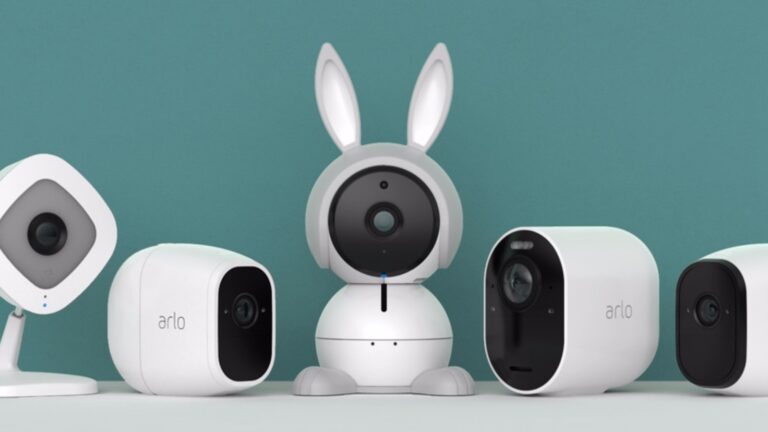
Adding an Arlo camera to your existing security system is a straightforward process that can be done by following a few simple steps. First, you will need to ensure that you have a compatible Arlo camera model. Arlo offers a range of cameras, including indoor and outdoor options, so you can choose the one that best suits your needs. Once you have selected the camera, you will need to set it up and connect it to your Wi-Fi network.
To add an Arlo camera, you will need to download the Arlo app on your smartphone or tablet. This app allows you to control and monitor your Arlo cameras from anywhere, providing you with real-time access to live video feeds and recorded footage. Once you have downloaded the app, you will need to create an Arlo account and log in. From there, you can follow the on-screen instructions to add your camera to the app and connect it to your Wi-Fi network.
Once your Arlo camera is connected to your Wi-Fi network, you can customize its settings to suit your preferences. The Arlo app allows you to adjust the camera’s motion detection sensitivity, set up activity zones, and receive notifications when motion is detected. You can also schedule recording times and access your camera’s footage from the app’s library. With these features, you can ensure that your Arlo camera is tailored to your specific security needs.

How do I manually add Arlo camera?
Arlo cameras are a popular choice for home security systems due to their ease of use and high-quality video capabilities. While most Arlo cameras can be set up wirelessly through the Arlo app, there may be instances where you need to manually add a camera to your system. This could be due to a variety of reasons, such as a camera not being detected by the app or a need to add a camera that is not within range of your existing Arlo base station.
Arlo cameras can be manually added in a few easy steps. First, turn on and connect your Arlo base station to your network. Plugging the base station into a power outlet and connecting it to your router over Ethernet usually does this. After setting up the base station, install the camera.
Press the base station sync button to manually add an Arlo camera. The rear or side of the base station may include a “”sync”” button or an icon of two arrows creating a circle. Hold the sync button until the base station LEDs blink.
Next, find the camera sync button. This button may be branded “”sync”” or have a similar icon on the camera’s bottom or back. Camera sync button press and release. The camera’s LED should blink when in sync.
Once in sync mode, the camera will try to contact the base station. Be patient—this may take a few minutes. After connecting the camera, its LED light will turn solid blue or green, depending on the model. Add the camera to your Arlo app and configure its settings.
How do I add an Arlo camera to my existing system?
Can I add an additional Arlo device to my existing Arlo camera or system?
- Launch the Arlo app or log in to your Arlo account at my.arlo.com.
- Tap or click Add New Device.
- Select the new device that you are adding from the list of devices.
- Follow the on-screen instructions to add your new Arlo device to your system.
Adding an Arlo camera to your system takes only a few steps. This article will help you add a camera to your Arlo setup, whether you’re extending or beginning from scratch.
Your Arlo base station must be powered on and connected to your home network first. The base station is the hub for all your Arlo cameras, so it must be operational before adding a camera.
Find the sync button on the base station and new Arlo camera. The sync button on the back or bottom connects the camera to the base station.
Press and release the base station sync button to sync. Sync mode is indicated by the base station’s front LED lights blinking. Press and release the new Arlo camera sync button. The camera’s LED lights will blink when ready to sync with the base station.
Both devices will automatically connect once in sync mode. Allow a few moments for this process. After syncing, the base station and camera LED lights will turn solid.
Add the new camera to your Arlo account last. Open the Arlo app on your phone or computer and go to settings. Select “Add a new device” and follow the on-screen prompts to finish setup.
Adding an Arlo camera to your system takes only a few steps. These instructions make it easy to expand your Arlo setup and boost home protection.
How do I sync my Arlo camera to my phone?
Syncing your Arlo camera to your phone is a crucial step in setting up your home security system. By syncing your camera to your phone, you can easily monitor your property and receive real-time notifications whenever motion is detected. The process of syncing your Arlo camera to your phone is relatively simple and can be done in just a few steps.
Step1: Arlo app download first.
The Arlo app must be downloaded before synchronizing your camera to your phone. Android and iOS users can download the Arlo app from their app stores. Launch the app and sign up for Arlo if you don’t have one.
Step 2: Power your Arlo camera.
Make sure your Arlo camera is powered before syncing it to your phone. Plug the camera into an outlet or use a rechargeable battery pack. Make sure the camera is on before continuing.
Step 3: Press Arlo camera sync.
Find your Arlo camera’s sync button. Note that camera models vary in sync button location, so consult the user handbook. Press and hold the sync button for a few seconds until the camera LED light blinks.
Step 4: Phone-Sync your Arlo camera.
After syncing your Arlo camera, open the Arlo app on your phone and tap “”Add Device””. The app helps you sync your camera to your phone. This normally requires a QR code or device ID. Follow the on-screen prompts and let the app find and connect your camera.
Step 5: Adjust camera settings.
After syncing your Arlo camera to your phone, you can adjust its settings. Adjust motion detection sensitivity, create activity zones.”
How do I reconnect my Arlo camera?
If you need to reconnect your Arlo camera, there are a few steps you can follow to ensure a successful reconnection. Whether you are experiencing connectivity issues or have recently moved your camera to a new location, reestablishing the connection is essential for proper functionality.
Step 1: Power on your Arlo camera before reconnecting. Check the battery or power source for proper operation. Charge or replace batteries in battery-powered cameras.
Second, test the Wi-Fi. Ensure your camera is within Wi-Fi range and the network is working. Changes to your Wi-Fi network or password need updating the camera’s settings.
Step 3: Power cycle your camera if it won’t reconnect. The camera must be turned off, unplugged, waited a few seconds, and then plugged back in and turned on. This often fixes camera connectivity issues and reconnects it to the network.
Step 4: Factory reset the camera to troubleshoot. This erases network settings and starts over. Press and hold the camera’s reset button (typically a small hole) with a paperclip or other object for a few seconds to reset it. After reset, you can set up the camera.
Step 5: If none of the preceding steps work, contact Arlo support. They may offer extra troubleshooting or reconnecting assistance.
How do I connect my Arlo camera to my Iphone?
Connecting your Arlo camera to your iPhone takes only a few steps. Arlo cameras are popular home security cameras due to their high-quality footage and simple functionality. Connecting your Arlo camera to your iPhone lets you view live video feeds and receive notifications on your phone, whether you want to watch your property while you’re away or your kids in the backyard.
How to connect iPhone to Arlo camera:
First, get Arlo from the App Store. Download free iPhone app Arlo. Launch the Arlo app and register after installation.
Arlo camera activation. Test your camera’s plug or batteries. When powered, the camera should start immediately.
- Wi-Fi your Arlo camera. The Arlo settings menu has “”Add Device.”” Connect your camera to Wi-Fi using the on-screen directions. Keep your Wi-Fi password handy.
Step 4: iPhone-Arlo camera sync. In Arlo’s settings, select “Sync.” after connecting your camera to Wi-Fi. The iPhone camera sync app guides you. QR codes or camera sync buttons may help.
- Setup Arlo camera. After syncing with iPhone, adjust camera settings. Adjust motion detection sensitivity, create activity zones, and enable notifications.
These procedures let you link your iPhone to your Arlo camera and monitor your home remotely. The Arlo app streamlines camera setup, live video, and recording.
A few steps connect Arlo cameras to networks. Check Arlo camera power and Wi-Fi range. Enter your phone or tablet Arlo account in the app. Accounts are free.
Tap “”Add Device”” on the app and choose “”Camera””. Connect your Arlo camera to Wi-Fi using the on-screen directions. Camera QR code scanning and Wi-Fi password entering are widespread.
After connecting the camera to your network, the Arlo app lets you adjust motion detection and recording. Add more Arlo cameras to your network using the same method.
Can you provide a detailed guide on setting up an Arlo camera for the first time?
Setting up an Arlo camera for the first time is a relatively straightforward process. Here is a step-by-step guide to help you get started:
Start by unboxing your Arlo camera and accessories. Remember to bring the camera, mounting hardware, power adapter, and Ethernet wire.
Step 2: Mount your Arlo camera somewhere convenient. It should be within Wi-Fi range and clearly visible to monitor the region. Mount the camera securely to a wall or surface with the mounting hardware.
Step 3: Use the power adapter to power the camera after mounting. Your camera may be wifi, so skip this step. If wired, connect the camera to your network or modem using Ethernet.
Step 4: Connect your Arlo camera to your network. Download the Arlo app from the App Store or Google Play Store. Launch the app and follow the on-screen steps to register and connect your camera to Arlo. Enter the necessary Wi-Fi credentials when requested.
Step 5: Customize your camera settings and preferences in the Arlo app after connecting to the network. Adjust motion detection sensitivity, create activity zones, and enable notifications. Explore the app and learn its features.
Step 6: Finally, test your Arlo camera for functionality. Activate motion detection or manually access the live feed via the app. Congratulations if everything works! Your Arlo camera is ready to use.
Are there any specific requirements or compatibility issues to consider when adding an Arlo camera?
When adding an Arlo camera to your network, there are a few specific requirements and compatibility issues that you need to consider. Firstly, it is important to note that Arlo cameras require a stable internet connection in order to function properly. This means that you need to have a reliable Wi-Fi network in place before attempting to add the camera.
In addition to a stable internet connection, you also need to make sure that your network meets the minimum requirements for Arlo cameras. These requirements include a minimum upload speed of 1 Mbps per camera and a minimum download speed of 2 Mbps per camera. It is recommended to check your internet speed using a speed test tool to ensure that it meets these requirements.
Furthermore, compatibility is another important factor to consider when adding an Arlo camera. Arlo cameras are compatible with a wide range of devices, including smartphones, tablets, and computers. However, it is important to check the specific compatibility requirements for your device before attempting to add the camera. Arlo provides a list of compatible devices on their website, so be sure to consult this list to ensure that your device is compatible.
Is there a mobile app or software that needs to be installed to add and manage Arlo cameras?
Yes, to add and manage Arlo cameras, you will need to install the Arlo mobile app or software. The Arlo mobile app is available for both iOS and Android devices, while the Arlo software is compatible with Windows and Mac computers.
Once you have installed the app or software, you will need to create an Arlo account or log in to your existing account. This account will be used to access and manage your Arlo cameras.
The Arlo mobile app and software provide a user-friendly interface that allows you to easily add and configure your Arlo cameras. You can add multiple cameras to your account and customize their settings, such as motion detection sensitivity, video quality, and recording schedules.
Are there any troubleshooting tips or common issues to be aware of when adding an Arlo camera?
When adding an Arlo camera to your network, there are a few troubleshooting tips and common issues that you should be aware of. These can help you ensure a smooth setup process and avoid any potential problems.
1. Check your Wi-Fi signal: Before adding an Arlo camera, make sure that your Wi-Fi signal is strong and stable in the area where you plan to install the camera. Weak or unstable Wi-Fi can cause connectivity issues and affect the camera’s performance. Consider using a Wi-Fi range extender if needed.
2. Ensure proper camera placement: The placement of your Arlo camera is crucial for optimal performance. Make sure it is positioned within the recommended range of your Wi-Fi router and avoid placing it near other electronic devices that may interfere with the signal. Additionally, ensure that the camera is installed at the right height and angle to capture the desired area.
3. Double-check network credentials: When adding the Arlo camera to your network, ensure that you enter the correct Wi-Fi network name (SSID) and password. Typos or incorrect credentials can prevent the camera from connecting to your network. It’s also a good idea to verify that your network is using the appropriate security protocol (WPA2 is recommended) to ensure a secure connection.

Conclusion
Arlo cameras are popular home security cameras due to their easy installation and user-friendliness. You can install an Arlo camera to your setup in a few easy steps, regardless of your tech skills. This article will help you add an Arlo camera to your home security system so you can easily monitor your property and family. Adding an Arlo camera starts with having the right gear. An Arlo camera, suitable base station, and reliable internet are needed. Arlo cameras are wire-free, so they don’t need base station or power outlet connections. This makes them adaptable and easy to install anywhere.
Once you have gathered all the necessary equipment, the next step is to set up the base station. The base station acts as the central hub for all your Arlo cameras, camera batteries allowing you to control and monitor them from a single location. To set up the base station, simply connect it to your router using the provided Ethernet cable and plug it into a power outlet. Once the base station is powered on, it will automatically connect to your internet network.
After setting up the base station, you can proceed to add your Arlo camera to the system. To do this, open the Arlo app on your smartphone or tablet and follow the on-screen instructions to create an Arlo account. Once you have created an account, select the option to add a new device and follow the prompts to sync your camera with the base station. This typically involves pressing a sync button on the camera and waiting for it to connect to the base station.

