Introduction
How To Install The Blink Video Doorbell: The Blink Video Doorbell is a cutting-edge home security device that allows you to monitor and protect your property with ease. With its advanced features and user-friendly installation process, this doorbell is a must-have for anyone looking to enhance their home security system. In this article, we will guide you through the step-by-step process of installing the Blink Video Doorbell, ensuring that you can enjoy the benefits of this innovative device in no time.
Home security is a top priority for many homeowners, and the Blink camera Video Doorbell offers a convenient and effective solution. This doorbell allows you to see, hear, and speak to anyone at your front door from your smartphone or tablet, no matter where you are. Whether you’re at work, on vacation, or simply relaxing at home, you can have peace of mind knowing that you have complete control over who enters your property.
Installing the Blink Video Doorbell is a straightforward process that can be completed by anyone, regardless of their technical expertise. The doorbell comes with a comprehensive installation guide that provides clear instructions and diagrams to help you every step of the way. Additionally, the Blink app, available for both iOS and Android devices, offers a user-friendly interface that simplifies the installation process even further.

Can I install Blink Video Doorbell without screws?
Yes, you can install the Blink Video Doorbell without screws. The Blink Video Doorbell is designed to be a versatile and easy-to-install device that can be mounted in various ways to suit your needs. Whether you live in a rented apartment or simply prefer not to drill holes in your walls, there are alternative methods available for installing the Blink Video Doorbell.
One option for installing the Blink Video Doorbell without screws is to use adhesive mounting tape. This tape is strong enough to securely hold the doorbell in place, yet it can be easily removed without leaving any residue or damage behind. Simply attach the adhesive tape to the back of the doorbell and press it firmly against the desired surface. Make sure to clean the surface beforehand to ensure proper adhesion.
Another option is to use a mounting bracket or plate that can be attached to the wall or door frame using adhesive tape or strong adhesive. The Blink Video Doorbell can then be attached to the bracket or plate, providing a secure and stable installation without the need for screws. This method allows for easy removal and repositioning of the doorbell if needed.
If you prefer a more temporary installation, you can also consider using a removable adhesive hook or hanger. These hooks are designed to hold a certain amount of weight and can be easily attached and removed without causing any damage to the surface. Simply attach the hook to the desired location and hang the Blink Video Doorbell from it.
It’s important to note that while these alternative installation methods can be convenient and practical, they may not provide the same level of security and stability as screw-mounted installations. If you live in an area with high wind or extreme weather conditions, it’s recommended to use screws for a more secure installation. Additionally, always follow the manufacturer’s instructions and guidelines when installing the Blink Video Doorbell to ensure proper functionality and performance.
Can you stick Blink Doorbell to door?
Yes, you can stick the Blink Doorbell to your door. The Blink Doorbell is designed to be easily installed on any type of door, whether it is made of wood, metal, or any other material. The doorbell comes with a strong adhesive backing that allows you to securely attach it to your door without the need for any screws or drilling.
The adhesive backing is specifically designed to withstand various weather conditions, including rain, snow, and extreme temperatures. This ensures that the Blink Doorbell stays firmly in place and does not get damaged or fall off over time. The adhesive is also strong enough to hold the doorbell securely, even with repeated use.
When installing the Blink Doorbell, it is important to clean the surface of your door thoroughly to ensure proper adhesion. You should remove any dirt, dust, or grease that may be present on the door. This can be done using a mild detergent and water, or a cleaning solution specifically designed for door surfaces.
Once the surface is clean and dry, you can peel off the protective backing from the adhesive and carefully press the Blink Doorbell onto the door. Make sure to apply firm pressure to ensure proper adhesion. It is recommended to hold the doorbell in place for a few seconds to allow the adhesive to bond securely.
After installing the Blink Doorbell, it is important to test it to ensure that it is working properly. You can do this by pressing the doorbell button and checking if it activates the chime or sends a notification to your smartphone, depending on the model you have. If the doorbell is not working as expected, you may need to reposition it or contact the manufacturer for further assistance.
Can you install a doorbell camera yourself?
Yes, you can install a doorbell camera yourself. With the advancements in technology, doorbell cameras have become more user-friendly and easier to install. Installing a doorbell camera can provide you with added security and convenience, allowing you to monitor your front door and receive notifications when someone is at your doorstep.
Before you begin the installation process, it is important to choose the right doorbell camera for your needs. There are various options available in the market, ranging from basic models to more advanced ones with features like motion detection and two-way audio. Consider your budget and the specific features you require before making a purchase.
Once you have chosen the doorbell camera, the first step is to turn off the power to your existing doorbell. This can be done by switching off the circuit breaker that controls the doorbell. It is crucial to ensure that there is no power running to the doorbell before you start working on the installation.
Next, remove your existing doorbell and disconnect the wires. Most doorbell cameras come with detailed instructions on how to connect the wires to the camera. Follow these instructions carefully to ensure a proper connection. It is important to note that if you are not comfortable working with electrical wiring, it is advisable to seek professional help.
After connecting the wires, attach the doorbell camera to your front door using the provided screws or adhesive. Make sure it is securely fastened to prevent any tampering or theft. Once the camera is installed, you can turn the power back on and test the functionality of the doorbell camera.
Can you mount Blink Doorbell with tape?
Yes, you can mount a Blink Doorbell with tape. The Blink Doorbell is a wireless video doorbell that allows you to monitor your front door from your smartphone or tablet. It is designed to be easily installed and does not require any wiring or drilling. One of the installation options for the Blink Doorbell is to use tape to mount it to your door or wall.
Using tape to mount the Blink Doorbell offers several advantages. First, it is a quick and easy installation method that does not require any tools or special skills. You simply need to clean the surface where you want to mount the doorbell, peel off the backing of the tape, and press the doorbell firmly against the surface. The adhesive on the tape is strong enough to securely hold the doorbell in place.
Another advantage of using tape to mount the Blink Doorbell is that it is a non-permanent installation method. If you decide to move the doorbell to a different location or if you no longer need it, you can easily remove it without leaving any marks or damage on your door or wall. This makes it a great option for renters or for those who may want to change the location of their doorbell in the future.
However, it is important to note that the effectiveness of tape as a mounting method may depend on the surface where you are mounting the doorbell. Smooth and clean surfaces, such as glass or metal, tend to provide better adhesion for the tape. If you are mounting the doorbell on a rough or textured surface, the tape may not adhere as well and you may need to consider alternative mounting options.
Is Blink Doorbell waterproof?
Yes, the Blink Doorbell is waterproof. This means that it is designed to withstand exposure to water and other elements without being damaged. Whether it’s rain, snow, or any other form of moisture, you can trust that your Blink Doorbell will continue to function properly.
The waterproof feature of the Blink Doorbell is particularly important because it is an outdoor security device. It is meant to be installed outside your home, where it will be exposed to various weather conditions. By being waterproof, the Blink Doorbell can continue to provide reliable security and surveillance even in the harshest of weather.
When it comes to the specific waterproof rating of the Blink Doorbell, it is important to note that it is rated as IP65. This rating indicates that the device is completely protected against dust and can withstand low-pressure water jets from any direction. In practical terms, this means that the Blink Doorbell can handle heavy rain and splashes without any issues.
Furthermore, the Blink Doorbell is also designed to be resistant to extreme temperatures. It can operate in temperatures ranging from -4°F to 113°F (-20°C to 45°C), making it suitable for use in a wide range of climates.
Overall, the waterproof feature of the Blink Doorbell ensures that you can rely on it to provide continuous security and surveillance, regardless of the weather conditions. Whether it’s raining cats and dogs or snowing heavily, you can have peace of mind knowing that your Blink Doorbell will continue to function effectively.
Installing the Blink video doorbell is a straightforward process that can be completed in a few simple steps. Here is a step-by-step guide to help you with the installation:
Step 1: Start by ensuring that you have a stable Wi-Fi connection and a smartphone or tablet with the Blink app installed. This app will be used to set up and control your video doorbell.
Step 2: Choose a suitable location for your video doorbell. It should be near your front door and within the range of your Wi-Fi network. Make sure there is a power outlet nearby as well.
Step 3: Use the provided screws and mounting bracket to attach the doorbell to the wall or door frame. Make sure it is securely fastened.
Step 4: Connect the video doorbell to your Wi-Fi network using the Blink app. Follow the on-screen instructions to complete the setup process.
Step 5: Once the setup is complete, you can customize the settings and preferences of your video doorbell through the app. This includes adjusting motion detection sensitivity, setting up notifications, and more.
Step 6: Test the video doorbell to ensure it is functioning properly. You can do this by ringing the doorbell or triggering the motion detection feature.
By following these step-by-step instructions, you can easily install your Blink video doorbell and enjoy the added security and convenience it provides.
Are there any specific tools or equipment required for the installation process?
Yes, there are specific tools and equipment required for installing the Blink video doorbell. To ensure a successful installation, you will need the following:
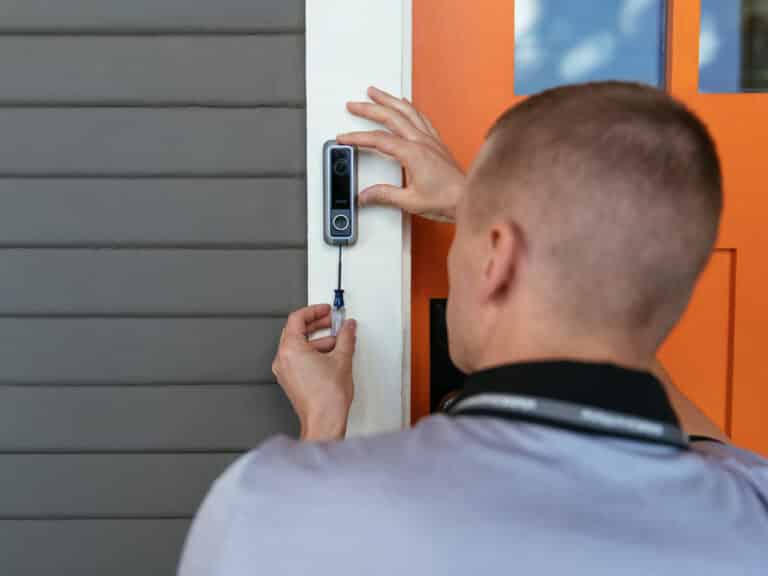
1. Screwdriver: A screwdriver is necessary for removing any existing doorbell and attaching the Blink video doorbell to your doorframe or wall. Make sure you have the appropriate screwdriver size for the screws provided with the doorbell.
2. Drill: If you plan to mount the doorbell on a wall instead of a doorframe, you may need a drill to create holes for the screws. Ensure you have the correct drill bit size for the screws.
3. Level: A level is essential for ensuring that the doorbell is installed straight and level. This will prevent any issues with the doorbell’s functionality and appearance.
By having these tools and equipment ready before starting the installation process, you can ensure a smooth and hassle-free setup of your Blink video doorbell.
Can you provide any troubleshooting tips or common issues that may arise during installation?
During the installation process of the Blink video doorbell, you may encounter a few common issues or face some troubleshooting situations. Here are some tips to help you overcome these challenges:
1. Poor Wi-Fi Signal: One of the most common issues is a weak Wi-Fi signal. This can result in a poor connection between the doorbell and your smartphone or other devices. To resolve this, ensure that your Wi-Fi router is placed in a central location and not obstructed by walls or other objects. You can also try moving the router closer to the doorbell or installing a Wi-Fi extender to boost the signal strength.
2. Incorrect Placement: Another issue that may arise is improper placement of the doorbell. It is important to position the doorbell in a location that provides a clear view of the entrance and minimizes false motion alerts. Make sure the doorbell is installed at the correct height and angle, and avoid placing it near objects that may obstruct the camera’s view.
3. Battery Drain: If you notice that the battery of your Blink video doorbell is draining quickly, there could be a few reasons for this. First, check if the doorbell is constantly recording or if there are excessive motion alerts. Adjust the motion detection settings to optimize battery life. Additionally, extreme temperatures can also affect battery performance, so ensure that the doorbell is not exposed to extreme heat or cold.
Are there any additional features or settings that can be customized after the installation is complete?
Yes, there are several additional features and settings that can be customized after the installation of the Blink video doorbell. One of the key features is the motion detection settings. You can adjust the sensitivity of the motion sensor to ensure that you receive notifications only when necessary. This is particularly useful if you live in a busy neighborhood or have pets that may trigger false alarms. Additionally, you can set up specific zones for motion detection, so you are alerted only when there is activity in certain areas, such as your front porch or driveway.
Another customizable feature is the two-way audio. Once the installation is complete, you can adjust the volume and microphone sensitivity to ensure clear and crisp communication with visitors at your door. This is especially handy if you are away from home and want to speak to delivery personnel or deter potential intruders. Furthermore, you can also customize the length of the video recordings. By default, the Blink video doorbell records clips that are up to 60 seconds long, but you have the option to shorten or lengthen the duration based on your preferences.
Is there a warranty or customer support available for the Blink video doorbell in case of any issues post-installation?
Yes, there is a warranty and customer support available for the Blink video doorbell in case of any issues post-installation. Blink offers a one-year limited warranty on their video doorbell, which covers any defects in materials or workmanship. This means that if you experience any problems with your doorbell within the first year of purchase, Blink will repair or replace it free of charge.
In addition to the warranty, Blink also provides customer support to assist you with any issues you may encounter after installation. Their support team is available via phone, email, or live chat to answer any questions or troubleshoot any problems you may have. They are knowledgeable about the product and can guide you through any necessary troubleshooting steps to resolve the issue.

Conclusion
Installing the Blink Video Doorbell is a relatively simple process that can be completed by following a few easy steps. By carefully reading the instruction manual and gathering the necessary tools, anyone can successfully install this innovative device to enhance the security of their home. With its user-friendly design and clear instructions, the Blink Video Doorbell is a great addition to any household.
First and foremost, it is important to carefully read the instruction manual provided with the Blink Video Doorbell. This will ensure that you have a clear understanding of the installation process and any specific requirements or precautions that need to be taken. The manual will also provide a list of the tools and materials that are needed for the installation, so it is important to gather these before getting started.
Once you have familiarized yourself with the instructions and gathered the necessary tools, you can begin the installation process. The Blink Video Doorbell camera is designed to be easily mounted on any surface, whether it be wood, brick, or concrete. The package includes all the necessary screws and anchors, so you don’t have to worry about purchasing any additional hardware.
Overall, installing the Blink Video Doorbell is a straightforward process that can be completed by anyone with basic DIY skills. By carefully following the instructions provided in the manual and taking the necessary precautions, you can have this innovative device up and running in no time. With its advanced features and user-friendly design, the Blink Video Doorbell is a great investment for enhancing the security and convenience of your home.

