

Introduction
How To Attach Blink Outdoor Camera To Mount: Smart home security systems have transformed home and family security. Advanced security camera manufacturer Blink is a pioneer in this field. Due to its wireless capabilities, weather resistance, and remarkable features, the Blink Outdoor Camera is very popular. To get the best video coverage, it needs to be installed and mounted correctly.
Step-by-step instructions for mounting a Blink Outdoor Camera for secure surveillance. Whether you’re tech-savvy or new, we can help. Installation tools and materials are covered in the first section. We will list the Blink Outdoor Camera bundle components and suggest any additional items to improve mounting.
The different types of mounts available for the Blink Outdoor Camera, highlighting their distinct features and suitable applications. Understanding magnetic mounts and adjustable brackets can help you choose the best one for your needs. hassle-free installation. Additionally, we’ll cover typical attachment issues and troubleshooting tips. This Blink Outdoor Camera troubleshooting guide will help you overcome obstacles and maximize its use.
How is Blink Outdoor mounted?
Finally, determine how to mount your Blink outdoor camera. The simplest method is to use a screw and anchor system. This requires drilling two holes into the mounting surface and using screws and anchors to secure the camera. If you don’t want to drill holes into your wall, you can also use an adhesive mount.
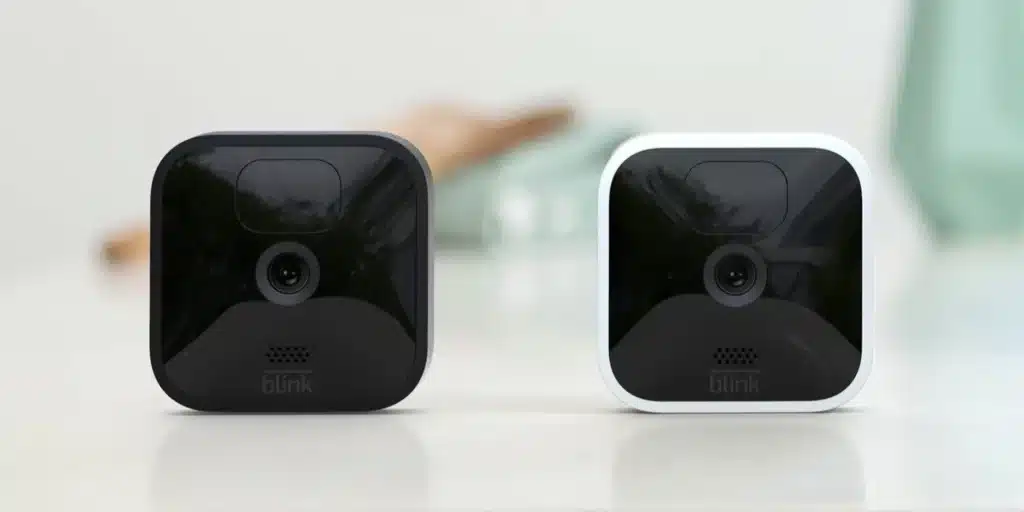
The Blink Outdoor Camera is versatile because it is easy to place. The camera can be used both inside and outside because it can be attached to different objects.
Users choose a Blink Outdoor Camera installation spot. The camera’s small size and weight allow for flexible installation on walls, ceilings, and other flat surfaces.
Blink Outdoor Camera’s mounting bracket and ball joint allow angle and positioning adjustments. The bracket can be secured with screws or tape. Ball joints easily mount cameras to brackets. The ball joint enables users tilt and swivel the camera for accurate aiming and best observation.
Wireless connectivity separates Blink Outdoor Camera. The camera is easy to install because it requires no cumbersome wires or cabling. Weatherproof construction makes it effective in tough outdoor circumstances.
Can you mount Blink Outdoor camera without screws?
HOLACA Screwless Wall Mount Brackrt for Blink Outdoor Camera Blink XT2 Blink Indoor, Easy to Install, No Tools Needed, No Messy, No Drilling, Strong 3M Adhesive Mount kit,Black (1 Pack) Amazon’s Choice highlights highly rated, well-priced products available to ship immediately.
Mounting the Blink Outdoor Camera without screws is possible. Blink offers adhesive tape mounting. This approach is ideal for temporary installations or surfaces where drilling is forbidden.
Use the adhesive tape strips included with the Blink Outdoor Camera to install it without screws. These adhesive strips stick securely to clean, smooth surfaces like walls and ceilings.
Mounting with adhesive tape is easy. Clear the surface of dust and dirt to maximize adherence. Then, remove the adhesive tape backing and press the mounting bracket to the surface. Allow the adhesive to sit for a few minutes for a solid bond.
Connect the Blink Outdoor Camera to the mounting bracket using the ball joint to change its angle. Mounting with sticky tape is convenient and drill-free, although it may not be as permanent or robust as screws. Screwing the mount may be safer if you install the camera in a high-traffic or adverse weather area.
Can you mount Blink camera to wall?
You don’t need any special tools to put it; you can do it by hand in a minute. Put the mount base on the wall, then attach the blink mini camera to the mounting kit. You can then change the angle to get a better view. Please change the angle before you place so that you know where to put the screws.
Wall-mounted blink cameras are popular for home and outdoor security. Blink cameras have a modular bracket for wall and surface mounting.
First, decide where to position the Blink camera on a wall. The area should have a clear view of the surveillance area and be within Wi-Fi range to maintain a reliable connection.
Depending on the surface, you can screw or tape the mounting bracket to the wall. Use screws and a screwdriver to fasten the bracket to the wall. Use the camera’s adhesive tape strips to fasten the mount to the wall without drilling.
Install the mounting bracket and attach the Blink camera with the ball joint. The ball joint makes camera angle adjustment easy to get the required view and coverage.
What is the maximum distance for Blink outdoor camera?
100 ft. away
How far away can camera units be placed? Under normal circumstances, the Sync Module is capable of communicating with Blink cameras up to 100 ft. away in any direction. We recommend keeping the Sync Module near your wireless router for the best signal strength.
The Wi-Fi signal in the region where the Blink Outdoor Camera is mounted determines its maximum distance. The camera wirelessly links to the Blink Sync Module, your Wi-Fi hub.
Unless there are major impediments or interference that could impair the Wi-Fi signal, the Blink Outdoor Camera can be set up to 100 feet (30 meters) from the Blink Sync Module. Remember that several factors can alter the maximum distance:
The quality and strength of your Wi-Fi signal play a crucial role in determining the camera’s maximum distance. If you have a robust Wi-Fi network with minimal interference, the camera can achieve its maximum range more effectively.
Obstructions: Walls, large metal objects, or other obstacles between the camera and the Blink Sync Module can reduce the effective range. Thick walls or significant obstructions may limit the camera’s ability to maintain a reliable connection.
Other wireless devices or equipment operating in the same frequency range as your Wi-Fi network can cause interference and impact the camera’s maximum distance.
Can I mount my Blink camera outside?
Blink cameras are designed for both indoor and outdoor use. To set up your Blink camera outside, choose a location with a clear view of the area you want to monitor and use the included mounting kit to attach the camera to the wall or ceiling.
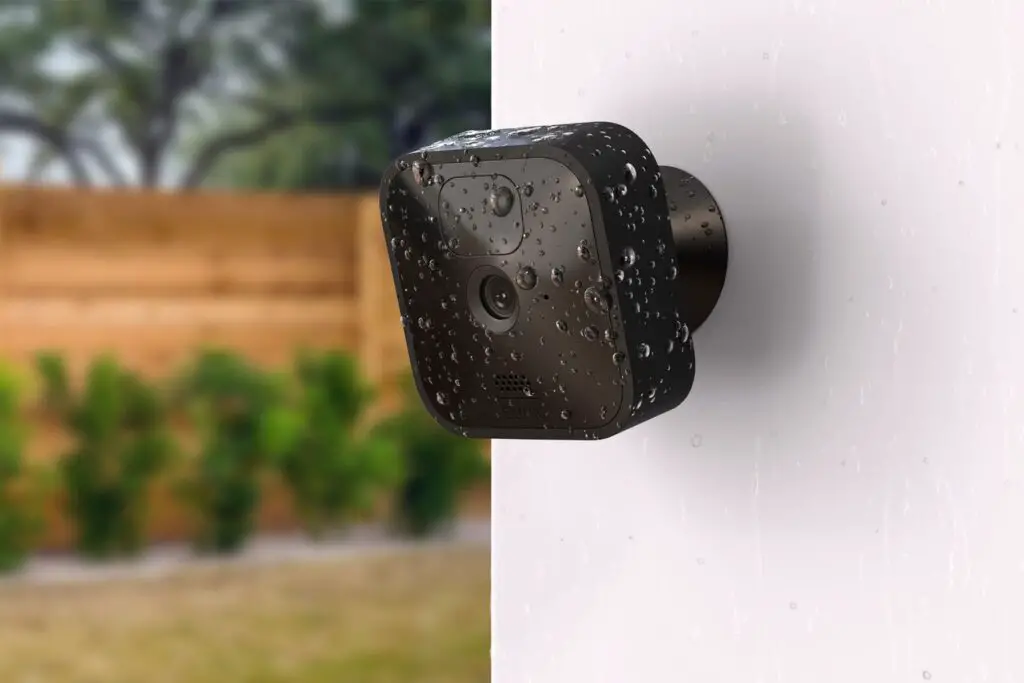
Outdoor Blink cameras are possible. A major benefit of the Blink outside Camera for outside use is its weatherproof build. The camera can withstand snow, rain, and cold.
The Blink Outdoor Camera’s weatherproof shell keeps the inside parts safe from dust and water, so it can be used reliably outside. Keeping an eye on the outside of your house, property, or other outdoor areas gives you peace of mind and protection.
When putting the Blink Outdoor Camera outside, position is crucial. Select a location with a clear view of the region to be monitored. Position the camera at the right height to capture details and prevent manipulation. To maintain a solid connection between the camera and the Blink Sync Module, your Blink system hub, evaluate the location’s Wi-Fi signal strength.
Where do you mount blink outdoor cameras?
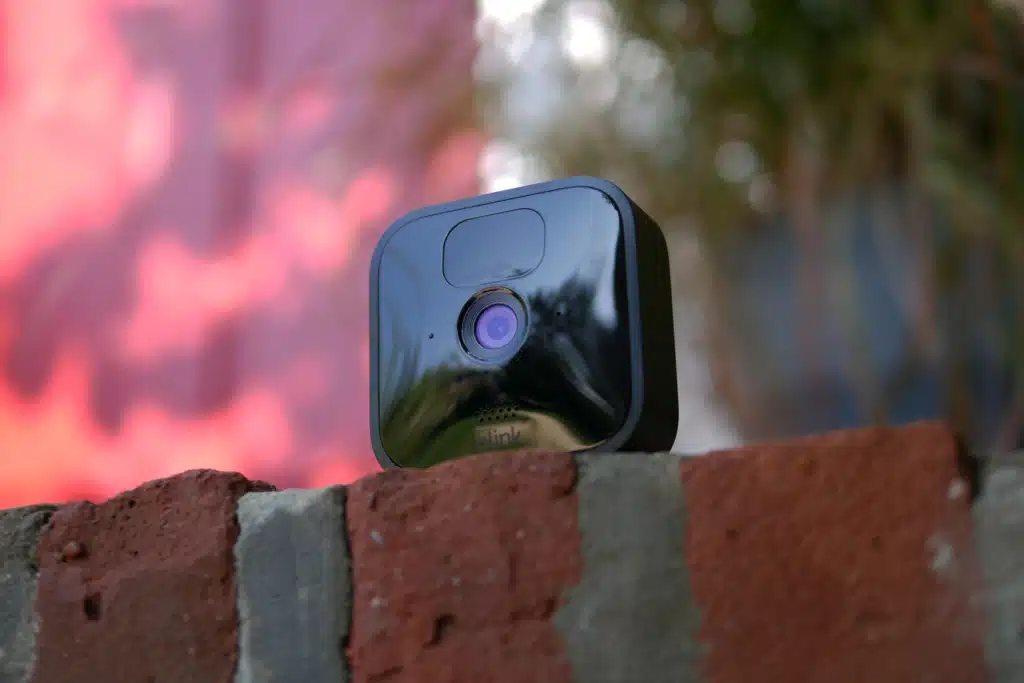
Some suggested locations for mounting a Blink outdoor camera include the front door or porch, the backyard or patio, the driveway or garage, and the side of the house.
Mounting Blink Outdoor cameras requires careful consideration of the areas you want to monitor and the camera’s capabilities. The primary goal is to position the cameras strategically to capture essential details and ensure optimal surveillance coverage. Here are some common locations where you can mount Blink Outdoor cameras:
Entry Points: Mounting cameras near entry points, such as front doors, back doors, and garage doors, can help capture any potential intruders or suspicious activity.
Driveway and Pathways: Placing cameras along driveways and pathways provides visibility for any approaching individuals or vehicles, enhancing security and safety.
Backyard and Garden: Mounting cameras in the backyard or garden areas can protect outdoor belongings and help monitor activities in these spaces.
Perimeter Surveillance: Installing cameras along the perimeter of your property can act as a deterrent and provide an early warning system for any unauthorized access.
High-Traffic Areas: Positioning cameras in areas with high foot traffic, such as hallways or common spaces, can help monitor activities indoors.
Blind Spots: Identify blind spots around your property and mount cameras to eliminate those areas with limited visibility.
Vulnerable Areas: Consider mounting cameras in areas with valuable assets or sensitive information, such as home offices or storage rooms.
Before mounting the cameras, perform signal strength tests to ensure a reliable connection to the Blink Sync Module. Additionally, avoid mounting the cameras too high or too low, as it may affect the camera’s field of view.
How do I attach the Blink Outdoor Camera to the Mount?
Attaching the Blink Outdoor Camera to the mount is a straightforward process that ensures a secure and stable installation for your surveillance needs. The Blink Outdoor Camera comes with a mounting bracket and a ball joint, offering versatile adjustment options to achieve the desired camera angle and coverage. Here’s a step-by-step guide on how to attach the Blink Outdoor Camera to the mount:
Assemble the Mount: Start by assembling the mounting bracket that comes with the Blink Outdoor Camera. The bracket usually consists of two pieces that need to be securely connected to form a stable base for the camera.
Choose the Mounting Location: Select the location where you want to install the Blink Outdoor Camera. Ensure the spot provides an unobstructed view of the area you wish to monitor.
Secure the Mounting Bracket: Attach the mounting bracket to the chosen surface using screws or adhesive tape. If you prefer to use screws, make sure to use the appropriate tools and ensure a firm and stable attachment.
Attach the Camera: Once the mounting bracket is in place, attach the Blink Outdoor Camera to the bracket using the ball joint. The ball joint allows for easy adjustments, enabling you to tilt and rotate the camera to achieve the desired angle.
Test the Positioning: Power on the camera and use the Blink app to check the camera’s field of view. Adjust the camera’s angle if needed to ensure it covers the intended surveillance area.
Secure the Cables: If necessary, secure the camera’s power cable to prevent it from being accidentally disconnected or tampered with.
By following these simple steps, you can confidently attach the Blink Outdoor Camera to the mount, maximizing its performance and enhancing the security of your home or property.
What tools do I need to attach the Blink Outdoor Camera to the Mount?
Attaching the Blink Outdoor Camera to the mount requires a few basic tools to ensure a secure and successful installation. Before you begin, gather the following tools:
Screwdriver: A Phillips head screwdriver is typically required to secure the mounting bracket to the chosen surface. Make sure the screwdriver is of the appropriate size for the screws provided with the Blink Outdoor Camera.
Level: A small level can be handy to ensure that the mounting bracket is installed evenly and straight, helping achieve the correct camera angle.
Drill (Optional): If you choose to use screws for mounting, a drill may be needed to create pilot holes in the surface, making it easier to screw in the mounting bracket securely.
Adhesive Tape (Optional): If you prefer a drill-free installation, adhesive tape strips are often provided with the Blink Outdoor Camera package. These can be used to attach the mounting bracket to smooth and clean surfaces.
Wi-Fi Signal Tester (Optional): While not a traditional tool, having a Wi-Fi signal tester or a smartphone app to check Wi-Fi signal strength can be helpful in determining the best location for the Blink Outdoor Camera and the Blink Sync Module (hub).
Ensure you have all the necessary tools before starting the installation process. Having the right tools at hand will make the process smoother and increase the likelihood of achieving a stable and reliable attachment for your Blink Outdoor Camera.
Can the Blink Outdoor Camera be mounted on any surface?
The Blink Outdoor Camera is designed to be mounted on a wide range of surfaces, providing users with flexibility and convenience when setting up their home security system. However, it’s essential to consider certain factors to ensure a secure and effective installation:
Flat Surfaces: The Blink Outdoor Camera can be mounted on most flat surfaces, such as walls, ceilings, and wooden posts. Ensure that the surface is sturdy and can support the weight of the camera and mounting bracket.
Indoor and Outdoor Use: The Blink Outdoor Camera is specifically designed for outdoor use, so it can be mounted on exterior walls, porches, and other outdoor areas exposed to the elements. It is also suitable for indoor use, providing versatility for monitoring various spaces.
Material and Texture: The mounting surface should be smooth and clean for optimal adhesion if using adhesive tape. If using screws, ensure the surface material allows for secure fastening.
Weather Resistance: The Blink Outdoor Camera’s weather-resistant design allows it to withstand rain, snow, and various weather conditions, making it suitable for outdoor mounting.
Wi-Fi Connectivity: Consider the Wi-Fi signal strength in the chosen mounting location to maintain a reliable connection between the camera and the Blink Sync Module.
Conclusion
Mounting a Blink Outdoor Camera is easy yet vital, improving your home security setup. Weather-resistant construction, wireless capabilities, and flexible mounting options let you monitor your property even in extreme outside circumstances. The stability, viewing angle, and performance of your Blink Outdoor Camera depend on its mount. Understanding mount options and their uses helps you choose one that meets your surveillance needs.
The troubleshooting suggestions here will also help you address installation issues. You’ll know how to fix mounting issues, improve Wi-Fi, and maximize the camera’s field of vision to enhance your security system. Secure your house, family, and belongings with the Blink Outdoor Camera, which is affordable and easy to use.
A little time and effort into proper mounting, you can reap the full benefits of this smart security device, allowing you to stay connected and vigilant, even when you’re away. With your Blink Outdoor Camera securely mounted, you can now enjoy the peace of mind that comes with knowing your property is under constant surveillance. Remember to periodically review the setup, ensure the camera’s positioning remains optimal, and take advantage of any firmware updates to keep your security system up-to-date and functioning at its best.