Introduction
How To Connect Lorex Camera To Phone: Lorex, a renowned brand in the field of security cameras, offers advanced camera systems that allow you to keep an eye on your property from anywhere using your smartphone. However, setting up the connection between your Lorex camera and phone may seem daunting at first. Don’t worry, though, as this guide will walk you through the process step by step, ensuring a seamless and secure connection.
Connecting your Lorex camera to your phone opens up a world of possibilities. You can monitor live video feeds, receive motion detection alerts, and even review recorded footage directly on your smartphone. Whether you want to keep an eye on your home while you’re away, check in on your office during off-hours, or ensure the safety of your loved ones, this guide will help you establish a reliable connection between your Lorex camera and phone.
To get started, you’ll need a few essential things: a Lorex camera system with an internet connection, a compatible smartphone, and the Lorex app installed on your device. Once you have these prerequisites in place, the setup process becomes straightforward. Lorex camera to your phone, including Wi-Fi and mobile data connections. We’ll explore how to pair your camera system with your smartphone using QR code scanning, manual device registration, or direct IP connection. Additionally, we’ll address common troubleshooting steps and provide tips to ensure a smooth setup process.

How do I connect a Lorex camera?
To connect your camera with the Lorex Home app
icon to add device. Use your phone to scan the Lorex Wi-Fi camera QR code. If your phone can’t scan the QR code, tap Manually Enter Device ID. Listen for the camera startup bell and green LED flash.
Choose the right spot: Start by choosing a Lorex camera installation location. Consider coverage, visibility, and power source accessibility. Make sure the camera and cables can reach the recorder or NVR. Use the included mounting gear and follow the manufacturer’s instructions to mount the camera. Secure the camera and align it to capture the desired area.
Cables: Connect the camera’s video cable to the recorder or NVR’s interface. Depending on model, Lorex cameras employ RG59 coaxial or CAT5e/CAT6 Ethernet connections. Secure the connections.
Power the camera: Use the provided power adapter or PoE if available. Make that the camera is powered and the recorder/NVR and camera LEDs are illuminated.
Configure the camera: Use the recorder/NVR or Lorex app to set the camera after connecting it. Configure IP address, subnet mask, and gateway using Lorex instructions. Connect camera and recorder/NVR to the same network. Download and install the Lorex app on your smartphone or use the Lorex web client on your PC to view the camera feed remotely. To add your camera, scan the QR code or enter its details in the app. You may see live video and alter settings after adding it.
How do I connect my Lorex recorder to my phone?
To connect with Lorex Secure:
Download and install the free Lorex Secure app from the App Store or Google Play Store. 2. Tap the Lorex Secure icon to launch the app. Connect to your system using the free Lorex Secure app for smartphones and tablets (iOS and Android).
Before proceeding, make sure that your Lorex recorder is compatible with the Lorex app. Check the manufacturer’s documentation or the Lorex website to confirm compatibility.
Start by setting up your Lorex recorder. Connect it to power, a monitor, and the internet using an Ethernet cable. Follow the manufacturer’s instructions for initial setup, including configuring system settings such as time, date, and network.
On your smartphone, go to the app store (App Store for iOS devices or Google Play Store for Android devices) and search for the “Lorex” app. Download and install the app on your phone.
Ensure that your Lorex recorder is connected to the internet. You can do this by either connecting it directly to your router using an Ethernet cable or setting up a wireless connection if your recorder supports Wi-Fi.
Launch the Lorex app: Open the Lorex app on your smartphone. Sign in to your Lorex account or create a new account if you don’t have one already.
Add your recorder: In the Lorex app, tap the “+” or “Add Device” button to add your Lorex recorder to the app. You can add the recorder by scanning the QR code located on the recorder or by manually entering the device information, including the device ID and verification code. Follow the app’s on-screen instructions to complete the process.
Can I view my Lorex camera online?
Live View & Playback
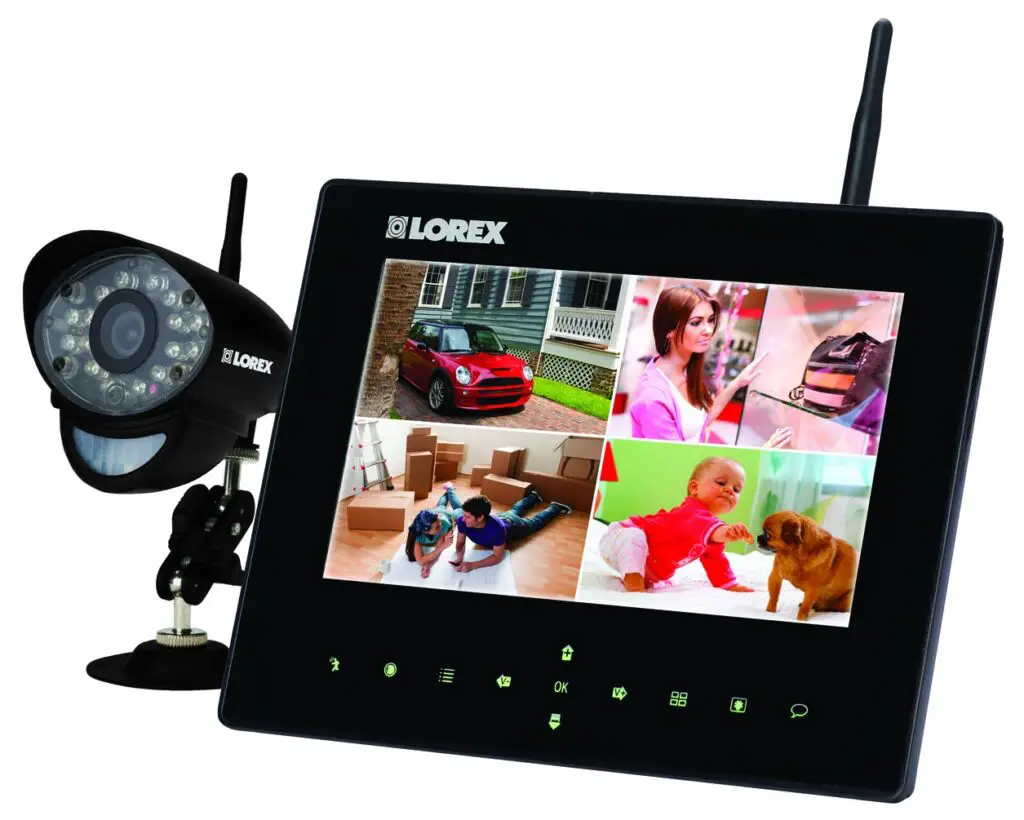
Lorex apps allow you to stay connected to your security device or system from virtually anywhere in the world. See exactly what your cameras see, or watch recorded playback of past events, right from your mobile device.
Lorex provides the Lorex Secure app, available for both iOS and Android devices. Download and install the app from the respective app stores on your smartphone or tablet. Once installed, launch the app and log in to your Lorex account. Follow the app’s instructions to add your cameras to the app by scanning the QR code on the camera or manually entering the camera’s information. Once added, you can view live video feeds, playback recorded footage, adjust camera settings, and receive motion detection alerts directly on your mobile device.
In addition to the mobile app, Lorex offers a web-based client that allows you to view your cameras from a computer or laptop. Open your preferred web browser and visit the Lorex website. Log in to your Lorex account and navigate to the web client section. Follow the instructions to add your cameras to the web client, either by scanning the QR code or manually entering the camera’s details. Once added, you can access live video feeds and perform various camera operations directly from the web client.
If you prefer to access your Lorex cameras using a web browser without relying on the Lorex web client, you can set up DDNS. DDNS assigns a domain name to your camera system, allowing you to access it using a unique URL. To use DDNS, you need to set up a DDNS account, configure your router to forward the necessary ports to your Lorex recorder, and enable DDNS within the camera system’s settings. With DDNS enabled, you can enter your domain name into a web browser from any internet-connected device to view your camera feeds.
What app works with Lorex cameras?
A professional app for professional security camera systems. Lorex Cloud keeps you connected no matter where life takes you.
Motion Detection Alerts
The Lorex Secure app sends push notifications to your mobile device when motion is detected by your Lorex cameras. You can customize the motion detection settings, such as sensitivity and detection zones, to reduce false alerts and focus on specific areas of interest. When an alert is received, you can quickly access the app to view the live video feed and investigate the triggering event.
Two-Way Audio
Some Lorex camera models support two-way audio functionality. With the Lorex Secure app, you can communicate with people near the camera through your mobile device. This feature is useful for remotely greeting visitors, giving instructions, or deterring potential intruders.
PTZ (Pan-Tilt-Zoom) Control
For Lorex cameras that have pan, tilt, and zoom capabilities, the Lorex Secure app enables you to control these functions from your mobile device. You can adjust the camera’s position and zoom in or out to focus on specific areas of interest.
Smart Search and Motion Events
The app offers smart search functionality that allows you to quickly locate specific events within recorded footage. You can search for motion-triggered events, mark them as favorites, or filter them based on specific criteria, such as motion zones or time periods.

Does Lorex require WIFI?
It doesn’t require Wi-Fi or the internet, but you can use it with the Lorex Home app if you want. While Lorex cameras perform well compared to brands like Arlo and Ring, they’re more expensive, and some models require stringing long wires around the house.
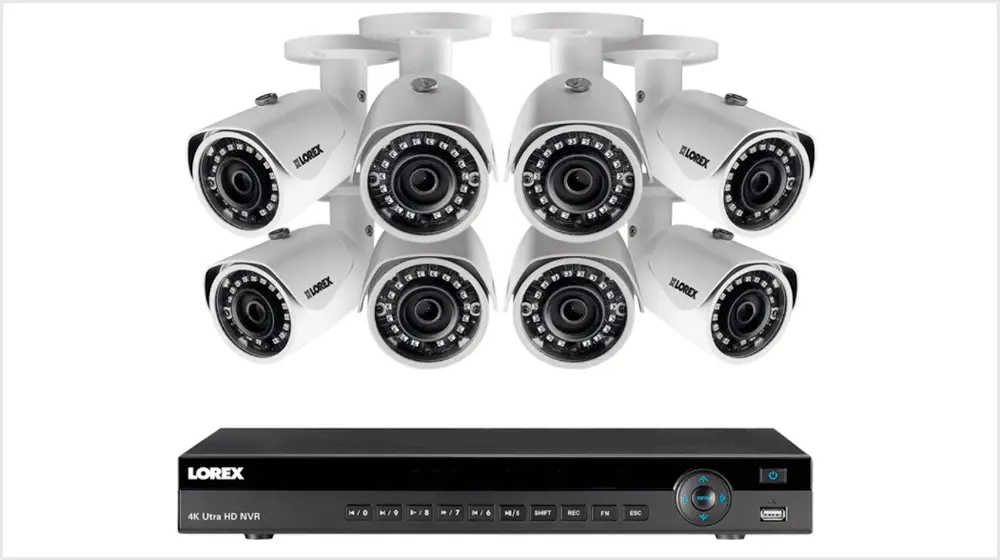
Wired Lorex camera systems typically do not rely on Wi-Fi for connectivity. These systems use wired connections, such as Ethernet cables, to connect the cameras to a recorder or Network Video Recorder (NVR). The cameras and the recorder/NVR are typically connected to the same network, either directly or through a router. The wired connection ensures a stable and reliable connection between the cameras and the recording device.
Wireless Lorex camera systems, on the other hand, utilize Wi-Fi for connectivity. These systems allow you to wirelessly connect the cameras to a wireless receiver or NVR. The cameras capture video footage and transmit it wirelessly to the receiver/NVR, which then stores and manages the footage. Wi-Fi connectivity enables the cameras to communicate with the receiver/NVR without the need for physical wires.
Lorex also offers hybrid camera systems that combine both wired and wireless components. These systems allow you to have a mix of wired and wireless cameras within the same setup. This flexibility gives you the option to connect cameras directly with Ethernet cables or utilize Wi-Fi connectivity based on your specific requirements and installation preferences.
Where is QR code on Lorex camera?
On newer systems the Device ID may be printed on the QR code sticker. This sticker is generally located on the side or base of a camera, or on the bottom of a DVR / NVR recorder.
In some cases, the QR code may be included on a separate card or sticker within the camera packaging. When you unbox your Lorex camera, check the included documentation or accessories for any labels or cards with the QR code printed on them.
Lorex cameras typically come with a quick start guide or user manual. These documents may include instructions on how to locate and scan the QR code. Look for a section that provides information on setting up the camera and adding it to the Lorex app. It may include diagrams or illustrations showing the QR code’s location.
If you cannot find the QR code on the camera or in the packaging, Lorex’s online resources can be helpful. Visit the Lorex website and search for your specific camera model. Look for support articles, user manuals, or setup guides related to your camera. These resources often provide detailed information on locating and scanning the QR code.
Where is Lorex camera ID?
The Device ID is printed on a label on the side panel of the recorder. The following is a brief overview of the controls available on the Live View screen of the Lorex Home app. For complete app instructions, see the Lorex Home manual on your product page at lorex.com.
On many Lorex camera models, the camera ID is located on the camera housing itself. Look for a small label or sticker on the camera body that displays the camera ID. It is often placed on the back or bottom of the camera, near the cable connections or mounting bracket. The camera ID is typically a combination of letters, numbers, or a QR code that can be scanned.
In some cases, the camera ID may be included on a separate card or sticker within the camera packaging. When you unbox your Lorex camera, check the included documentation or accessories for any labels or cards with the camera ID printed on them. The packaging may also provide instructions on where to find the camera ID.
Lorex cameras usually come with a quick start guide or user manual. These documents may include instructions on how to locate the camera ID. Look for a section that provides information on setting up the camera and finding the camera ID. It may include diagrams or illustrations showing the camera ID’s location.
If you have already set up your Lorex camera system and are trying to find the camera ID for troubleshooting or configuration purposes, you can often find it within the associated software or mobile app. Open the Lorex app or the software that you use to access your camera system, and navigate to the camera settings or device information section. Look for the camera ID listed there.
Are Lorex cameras legal?
Lorex products are designed for consumer and business use only and not for US federal governments, federally-funded projects or contractors subject to NDAA.
The legality of installing Lorex cameras in public areas, such as streets or parks, may differ from that of private areas. Generally, individuals have a lower expectation of privacy in public spaces, making it more permissible to record public areas. However, there may still be restrictions or specific regulations governing the use of surveillance cameras in public locations.
If your Lorex camera system includes audio recording capabilities, it’s important to be aware that laws regarding audio recording may vary. In some jurisdictions, audio recording may require the consent of all parties involved. It is essential to familiarize yourself with local laws regarding audio recording to ensure compliance.
It’s crucial to respect the privacy of individuals while using Lorex cameras. Avoid positioning cameras in areas where a reasonable expectation of privacy exists, such as bedrooms, bathrooms, or changing rooms. Always use Lorex cameras for legitimate security purposes and refrain from using them to invade someone’s privacy or engage in illegal activities.

Conclusion
Lorex camera to your phone is a relatively simple process that can greatly enhance your ability to monitor and secure your property remotely. By following the steps outlined in this guide, you can establish a seamless connection between your Connect Lorex camera system and your smartphone, enabling you to access live video feeds, receive motion detection alerts, and review recorded footage at your convenience.
Throughout the setup process, you have a stable internet connection and the Lorex app installed on your smartphone. Whether you choose to connect your camera system via Wi-Fi, mobile data, or direct IP connection, each method offers its own advantages and considerations. By carefully following the instructions provided by Lorex and using the appropriate setup method, you can establish a reliable and secure connection.
Remember, troubleshooting may be necessary if you encounter any difficulties during the setup process. Common issues such as connectivity problems, incompatible devices, or incorrect settings can be addressed by referring to the troubleshooting tips provided by Lorex or seeking assistance from their customer support.

