Introduction
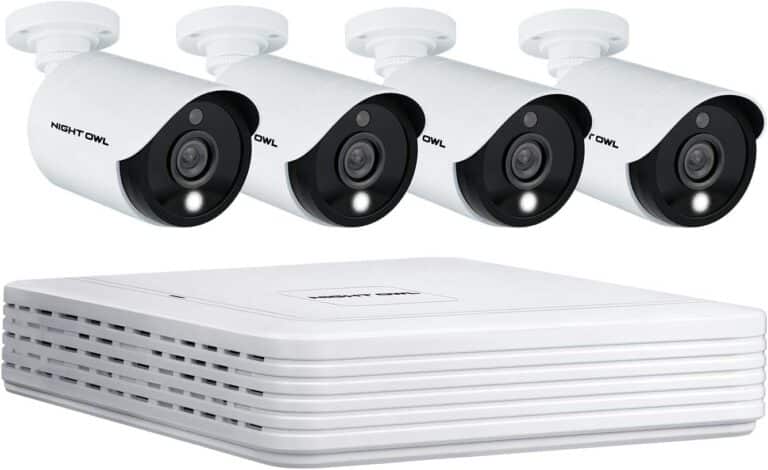
How To Install Night Owl Wired Security Cameras: Installing a reliable security camera system is essential for protecting your home or business. One popular option is the Night Owl wired security cameras, known for their high-quality video footage and advanced features. Whether you are a DIY enthusiast or a professional installer, this article will guide you through the step-by-step process of installing Night Owl wired security cameras.
Before diving into the installation process, it is important to understand why Night Owl wired security cameras are a preferred choice for many. These cameras offer exceptional video quality, capturing clear and detailed footage day and night. With their advanced infrared night vision technology, you can rest assured that your property is under constant surveillance, even in low-light conditions.
Additionally, Night Owl wired security cameras come equipped with motion detection capabilities. This means that they can detect any movement within their field of view and send you instant alerts via email or mobile notifications. This feature is particularly useful for keeping an eye on your property while you are away, ensuring that you are always aware of any suspicious activity.

How are wired security cameras installed?
Wiring security cameras requires numerous procedures to ensure correct installation and operation. Cables connect these cameras to a central recording device or network video recorder (NVR) for reliable and secure surveillance. Camera models and installation locations affect the installation process.
The best security camera positions must be determined first. This entails detecting blind spots and monitoring areas. Cameras should be placed at doorways, windows, and high-traffic areas. Effective surveillance requires evaluating the camera’s range of view and targeted coverage area.
Securely mounting the cameras follows location selection. Most wired security cameras have wall, ceiling, or other mounting brackets. Cameras must be mounted at the right angle and height to catch the desired footage. Secure the mounting brackets to prevent movement or tampering.
Cables must be run after camera attachment. Power and video connections are needed for wired security cameras. Cameras receive electricity from power cables, while video cables send video to the recorder. Hide or safeguard these cables to prevent tampering or damage.
Cameras can be connected to NVRs or recorders after cable installation. The recording device’s ports must be securely connected to video wires. Link power cables to an outlet or power supply. Check manufacturer directions for proper connection and configuration.
Does Night Owl wired security system need wifi?
Yes, the Night Owl wired security system does not require wifi to function. This security system is designed to work independently of an internet connection, making it a reliable option for those who do not have access to wifi or prefer not to rely on it for their security needs.
One of the main advantages of the Night Owl wired security system is its ability to operate without wifi. This means that even if your internet goes down or you experience a power outage, the system will continue to function and provide you with the necessary surveillance and protection.
Additionally, not relying on wifi for connectivity can provide added security. Wifi networks can be vulnerable to hacking and interference, which can compromise the effectiveness of your security system. By using a wired connection, the Night Owl system eliminates these potential vulnerabilities and ensures a more secure and reliable surveillance solution.
Furthermore, the lack of wifi requirement also makes the Night Owl wired security system easier to install and set up. You do not need to worry about connecting the system to your home network or dealing with any potential wifi connectivity issues. Simply install the cameras and connect them to the DVR, and you are ready to start monitoring your property.
The Night Owl wired security system does not need wifi to function. It offers a reliable and secure surveillance solution that operates independently of an internet connection. Whether you do not have access to wifi or prefer not to rely on it for your security needs, the Night Owl wired security system is a great option to consider.
How do I install night owl connect?
Installing Night Owl Connect is a simple and straightforward process that allows you to easily monitor and control your Night Owl security system from your smartphone or tablet. Whether you are a tech-savvy individual or a beginner, you can follow these steps to install Night Owl Connect and start enjoying the convenience and peace of mind it offers.
Step 1: Download the Night Owl Connect app
The first step in installing Night Owl Connect is to download the app onto your smartphone or tablet. The app is available for both iOS and Android devices and can be found in the respective app stores. Simply search for “”Night Owl Connect”” and click on the download button to start the installation process.
Step 2: Create an account
Once you have downloaded the app, open it and create a new account. This will require you to provide some basic information such as your email address and a password. Make sure to choose a strong password to ensure the security of your account.
Step 3: Connect your Night Owl security system
After creating an account, you will need to connect your Night Owl security system to the app. This can be done by following the on-screen instructions provided by the app. Typically, you will need to connect your smartphone or tablet to the same Wi-Fi network as your Night Owl system and then scan a QR code or enter a unique code to establish the connection.
Can I view my Night Owl cameras on my phone?
Yes, you can view your Night Owl cameras on your phone. Night Owl is a popular brand that offers a range of security camera systems for both residential and commercial use. These cameras are designed to provide high-quality video surveillance and can be easily accessed and controlled through a mobile app.
The Night Owl mobile app is available for both iOS and Android devices, making it convenient for users to monitor their cameras from anywhere at any time. With the app, you can view live video feeds from your cameras, playback recorded footage, and even control certain camera settings.
The Night Owl mobile app must be downloaded and installed from the App Store or Google Play Store to view your Night Owl cameras on your phone. After installing the app, establish an account and add cameras. This is normally done by scanning a QR code or entering the camera’s ID.
Open the app on your phone and log in to access your cameras after adding them. The app lists your cameras, and you can choose one to see. That camera’s live footage will appear on your phone.
It’s important to note that in order to view your Night Owl cameras on your phone, you will need to have an internet connection. This can be either through Wi-Fi or a cellular data network. Without an internet connection, you will not be able to access your cameras remotely.
Why are my Night Owl cameras not connecting?
There can be several reasons why your Night Owl cameras are not connecting. It is important to troubleshoot the issue to determine the cause and find a solution. Here are some possible reasons and steps you can take to resolve the problem.
1. Wi-Fi Connection: One common reason for cameras not connecting is a weak or unstable Wi-Fi connection. Make sure that your cameras are within range of your Wi-Fi router and that the signal strength is strong. You can try moving the cameras closer to the router or using a Wi-Fi extender to improve the signal.
2. Incorrect Network Settings: Check the network settings on your cameras to ensure that they are configured correctly. Make sure that the SSID (network name) and password are entered correctly. You may also need to check if your router has any specific settings or restrictions that could be preventing the cameras from connecting.
3. Power Issues: Ensure that your cameras are receiving power. Check the power cables and connections to make sure they are secure. If you are using battery-powered cameras, make sure the batteries are charged or replace them if necessary.
4. Firmware Updates: Check if there are any firmware updates available for your cameras. Outdated firmware can cause connectivity issues. Visit the Night Owl website or contact their support for instructions on how to update the firmware.
5. Firewall or Antivirus Software: Sometimes, firewall or antivirus software on your computer or network can block the cameras from connecting. Temporarily disable any such software and see if the cameras connect. If they do, you may need to adjust the settings of your security software to allow the camera connections.
What are the steps to install night owl wired security cameras?
Installing night owl wired security cameras involves several steps to ensure proper setup and functionality. Here is a step-by-step guide to help you with the installation process:
Step 1: Start by selecting the ideal locations for your cameras. Consider areas that require surveillance and ensure they are within the camera’s range.
Step 2: Once you have determined the locations, mount the cameras securely using the provided mounting brackets. Make sure they are positioned at the recommended angles for optimal coverage.
Step 3: Next, run the camera cables from each camera to the DVR location. Use cable clips or conduit to secure the cables and prevent any damage.
Step 4: Connect the camera cables to the corresponding ports on the back of the DVR. Ensure a secure connection by firmly plugging them in.
Step 5: Power on the DVR and connect it to a monitor or TV using an HDMI or VGA cable. Follow the manufacturer’s instructions to set up the DVR and configure the settings.
Step 6: Finally, test the cameras by viewing the live feed on the connected monitor or TV. Adjust the camera angles if necessary and make any additional configurations as needed.
By following these steps, you can successfully install night owl wired security cameras and enhance the security of your property.
Are there any specific tools or equipment required for the installation process?
Yes, there are specific tools and equipment required for the installation process of Night Owl wired security cameras. These tools and equipment ensure a smooth and successful installation. Here are some of the essential items you will need:
1. Power drill: A power drill is necessary for drilling holes in walls or other surfaces to mount the cameras securely. Make sure to use the appropriate drill bit size for the screws provided with the camera.
2.Screwdriver: Tightening the camera screws requires a screwdriver. Having both a Phillips and flathead screwdriver is advised because different cameras use different screws.
3. Ethernet cable: An Ethernet cable is required to connect the cameras to the DVR or monitor. Make sure to choose a high-quality cable that is long enough to reach the desired location.
4. Ladder: Depending on the height at which you plan to mount the cameras, a ladder may be necessary to safely reach and install them. Ensure the ladder is stable and secure before climbing.
5. Cable clips and ties: These accessories are useful for organizing and securing the cables during the installation process. They help prevent tangling and ensure a neat and professional-looking setup.
By having these tools and equipment ready before starting the installation process, you can ensure a hassle-free experience and achieve optimal results with your Night Owl wired security cameras.
Can you provide a detailed guide on how to connect the cameras to a DVR or monitor?
Connecting your Night Owl wired security cameras to a DVR or monitor is a crucial step in setting up your surveillance system. Here is a detailed guide on how to do it:
Step 1: Gather gear
Ensure you have all the equipment before starting. Night Owl wired security cameras, DVR or monitor, BNC cables, power adapters, and power supply are needed. Keep cables and connectors in good condition.
Step 2: Link cameras to DVR/monitor
Connect the cameras’ BNC cables to the DVR or monitor’s back BNC inputs. Match cable and input colors (yellow to yellow, black to black). To secure the connection, tighten the connectors.
Step 3: Power cameras
Next, plug the cameras’ power adapters into an outlet. Ensure the power supply can power all cameras. The cameras should power up and provide video to the DVR or monitor.
Step 4: DVR/monitor setup
After connecting and powering up the cameras, configure the DVR or monitor to view the feeds. To enter the settings menu and set up the cameras, follow the manufacturer’s instructions. Each camera may need a channel number and custom display settings.
Step 5: Check connection
Check camera feeds after configuring the DVR or monitor. Adjust camera angles and positions to ensure proper display. This is where you can set motion detection or recording.
Following these steps will connect your Night Owl wired security cameras to a DVR or monitor. Check your Night Owl user manual for model-specific instructions.
Are there any recommended locations or angles for mounting the cameras?
When it comes to mounting your night owl wired security cameras, it is important to consider the location and angle for optimal surveillance coverage. The right placement can greatly enhance the effectiveness of your security system. Here are some recommended locations and angles to consider:
1. Entry Points: It is crucial to mount cameras at all entry points of your property, such as doors, windows, and garage entrances. This ensures that any potential intruders are captured on camera as they attempt to gain access to your premises.
2. High Traffic Areas: Identify the high traffic areas around your property, such as driveways, walkways, and common gathering spots. Mounting cameras in these areas will help capture any suspicious activities or individuals passing by.
3. Blind Spots: Take note of any blind spots or areas with limited visibility around your property. These are the areas where criminals may attempt to hide or avoid detection. By strategically placing cameras in these blind spots, you can eliminate potential hiding spots and ensure comprehensive surveillance coverage.
Do you have any troubleshooting tips in case there are issues during the installation process?
During the installation process of night owl wired security cameras, it is possible to encounter some issues. However, with the right troubleshooting tips, these issues can be resolved effectively. Here are some tips to help you troubleshoot common problems:
1. No Power: If the camera is not receiving power, check if the power adapter is properly connected to the camera and the power source. Ensure that the power outlet is working by plugging in another device. If the issue persists, try using a different power adapter or contact customer support for further assistance.
2. No Video Signal: If there is no video signal on the monitor or DVR, check the camera connections. Make sure the cables are securely plugged into the camera and the DVR/monitor. If the cables are damaged, replace them. Additionally, check the settings on the DVR/monitor to ensure the correct input source is selected. If the problem persists, try connecting the camera to a different channel on the DVR or contact customer support for guidance.

Conclusion
Installing Night Owl connected security cameras is easy and can boost home or business security. You can install and optimize your cameras by following the manufacturer’s step-by-step instructions. Wired cameras also broadcast higher-quality video and have a more dependable connection. Easy installation is a major benefit of Night Owl connected security cameras. Most anyone can install these cameras with the correct tools and electrical wiring knowledge. Night Owl’s step-by-step instructions make the process even easier, preventing you from missing any crucial steps or making mistakes that could jeopardize your security system.
Furthermore, the use of wired cameras offers a more reliable connection compared to wireless options. Wireless cameras can be susceptible to interference from other devices or obstacles in the environment, which can result in a loss of signal or poor video quality. With wired cameras, you can avoid these issues and have peace of mind knowing that your security system is consistently providing clear and uninterrupted footage.
Finally, connected cameras transmit better video. Wired cameras broadcast uncompressed video, producing clearer, more detailed images than wireless cameras. This can be crucial for identifying people or recording crucial information in a security incident. Installing Night Owl connected security cameras can boost home or business security. These cameras are easy to install, connect, and broadcast high-quality video, making them a trustworthy and effective property monitoring and protection solution.

