Introduction
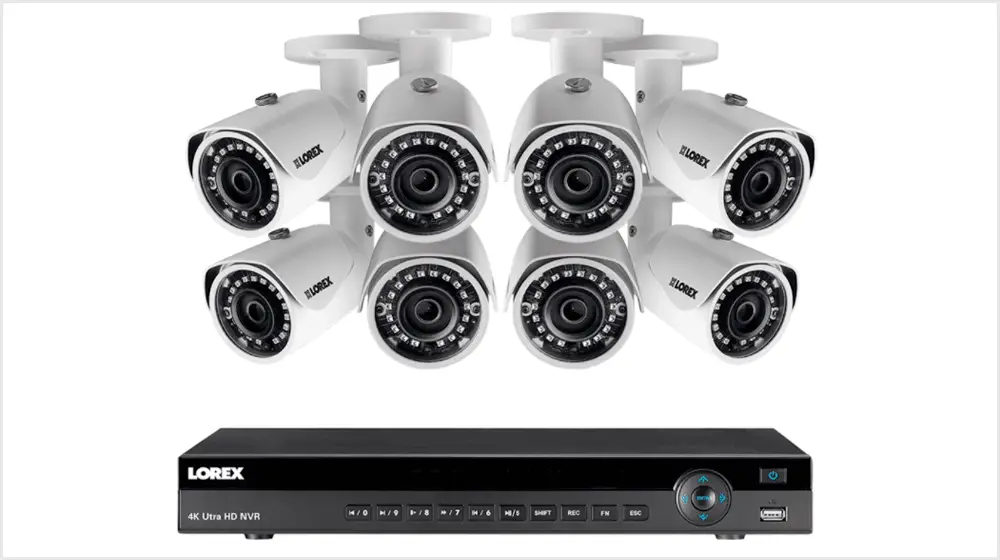
How To View Lorex Cameras On Pc: Lorex cameras provide an effective way to monitor your home or business premises, ensuring enhanced security and peace of mind. While accessing your camera feed on a dedicated monitor is convenient, you may also want to view your Lorex cameras on your PC for a more flexible and centralized monitoring experience. By connecting your Lorex camera system to your local network and utilizing the appropriate software, you can easily view and manage your cameras directly from your computer.
To begin, you need to ensure that your Lorex camera system is properly connected to your local network. This can be achieved by establishing a wired Ethernet connection or setting up a wireless connection, depending on the capabilities of your Lorex camera system. Once the cameras are connected, the next step is to install the appropriate software on your PC.
Lorex offers different software options depending on the security camera system you have. The software can usually be downloaded from the official Lorex website under the Support or Downloads section. Look for software like Lorex Client, Lorex Client 11, or Lorex Cloud Client, which are commonly used to access and manage Lorex cameras on a PC.

Can I view my Lorex cameras on my PC?
All Lorex security camera systems provide convenient remote viewing on smart devices or PCs.
Connect your Lorex camera system to your local network first. This can be done by wired Ethernet or wireless, depending on your Lorex camera system. Check your network connectivity and camera connections.
To view your Lorex cameras on your PC, you need to install the appropriate software. Lorex offers different software options, such as Lorex Client, Lorex Client 11, or Lorex Cloud Client, depending on the camera system you have. Visit the official Lorex website and navigate to the Support or Downloads section to find and download the software that is compatible with your camera system.
After downloading, install the app on your PC. Start the software and use the setup wizard to customize it. The setup process may require you to provide the system name, IP address, port number, username, and password. These details are normally in your Lorex camera system’s handbook or settings menu.
After the software is installed and configured, you need to add your Lorex camera system to the software. This step involves entering the necessary details, such as the IP address and login credentials, to establish a connection between your PC and the camera system. Once the connection is established, the software will display a live video feed from your Lorex cameras on your PC screen.
Can I access Lorex Home with a PC?
It Lorex Cloud Client allows you to access your security system on your Mac or PC.
An Android emulator can run Lorex Home on a PC. Android emulators let you run Android apps on a PC. PC emulators like Bluestacks, Nox Player, and LDPlayer can be downloaded. The emulator lets you search for and install Lorex Home from the Google Play Store. Launch the Lorex Home app in the emulator to use it like a mobile device.
Lorex Web Client lets users access their camera systems via a web browser. Open your PC’s selected web browser and visit the Lorex Web Client login page. Log in to your Lorex Home account to access your camera system. While it may not have the full capabilities of the smartphone app, the web-based interface lets you see live video feeds, examine recorded material, and manage your camera system.
Lorex may offer camera-specific PC client software. This software, like Lorex Client, lets you connect and access your Lorex cameras from your PC. Look for PC client software on the Lorex website or in your camera system’s manual. If available, download and install the software on your PC, then follow the setup instructions to connect to your Lorex camera system and use its capabilities.
Can you view Lorex cameras online?
You can view live video from your HD WiFi camera or DVR / NVR system through a computer using the FLIR Secure web portal.
Lorex Cloud
It Lorex Cloud lets consumers remotely access their cameras via the internet. You may safely watch your camera feeds online using a web browser or the Lorex Cloud mobile app after creating an account and synchronizing your cameras. This method is convenient and versatile since you can access your cameras from any internet-connected PC, laptop, or mobile device.
Port Forwarding
Port forwarding lets you watch Lorex cameras online. Configuring your router to allow internet connections to the Lorex camera system is port forwarding. You can remotely access and see your Lorex system’s cameras using your network’s public IP address or domain name by forwarding the camera system’s ports to its IP address. Users familiar with networking should utilize this option, which needs router configuration and technical understanding.
Virtual Private Network (VPN)
Another option to securely view Lorex cameras online is via a VPN. VPNs encrypt your device’s connection to a remote server, extending your network securely over the internet. Access Lorex cameras locally by connecting to a home network VPN server. This method encrypts all device-camera system communication, improving security.
Why can’t I see my Lorex cameras online?
Why Is My Lorex Camera Offline. Lorex smart Wi-Fi cameras fall offline once disconnected from the network or the power supply is disrupted. Again, it could be a poor signal from your Lorex Home Center signal. Once the Home center or app can’t reach your camera, it’s displayed as offline.
Dynamic IP Address
If your internet service provider assigns a dynamic IP address to your network, the IP address of your Lorex camera system might change periodically. This can disrupt your ability to view the cameras online. To address this, consider setting up a Dynamic DNS (Domain Name System) service. Dynamic DNS allows you to associate a domain name with your changing IP address, providing a consistent and accessible address to connect to your cameras.
Some internet service providers (ISPs) impose restrictions or block certain ports that are essential for accessing LoreInternet Service Provider Restrictions
x cameras online. Contact your ISP to inquire about any restrictions they may have in place and work with them to ensure the necessary ports are open for your camera system.
Compatibility Issues
Ensure that you are using compatible software or apps to view your Lorex cameras online. Check for updates to the Lorex software or mobile app and install the latest version if available. Also, verify that your device meets the minimum requirements for running the software or app. Incompatibility between the software or app and your device can prevent you from viewing the cameras online.

What app works with Lorex cameras?
A professional app for professional security camera systems. It Lorex Cloud keeps you connected no matter where life takes you.
Lorex Cloud
Lorex also offers cloud-based camera access via Lorex Cloud. It Lorex Cloud lets Android and iOS users view camera feeds remotely, access cloud-stored recordings, and receive motion detection notifications. Lorex Cloud lets consumers access their cameras from anywhere with an internet connection, making it convenient.
Flir Secure
Flir Secure is a mobile app compatible with Lorex camera systems. It offers features similar to Lorex Home, including live video streaming, playback of recorded footage, and motion detection alerts. Flir Secure is designed to provide users with remote access and control over their Lorex cameras, ensuring they can monitor their property even when they are away.
Lorex Eco
Lorex Eco is an app designed specifically for viewing Lorex Eco DVR systems. It is available for both Android and iOS devices. Lorex Eco allows users to view live video, review recorded footage, and adjust camera settings on their Eco DVR system. This app is suitable for users who have an Eco DVR and want a dedicated app for accessing and managing their cameras.
How do I watch Lorex camera on my smart TV?
This is the most common and easiest way to watch Lorex cameras on your smart TV. Simply connect the HDMI cable from the Lorex camera to the HDMI port on your TV. Once connected, switch your TV to the HDMI input that the camera is connected to and you should be able to see the camera feed on your TV screen.
Some smart TVs have dedicated apps available for Lorex camera systems. These apps are specifically designed to integrate with Lorex cameras and provide direct access to live video feeds, recorded footage, and camera settings. Check your smart TV’s app store or search for the Lorex app to see if it is available for download.
Ensure that your Lorex camera system is set up and connected to the Lorex app on your mobile device. Check if your smart TV supports casting or screen mirroring. You can refer to the TV’s user manual or consult the manufacturer’s website for instructions specific to your model. On your mobile device, open the Lorex app and select the camera you want to view.
Ensure that your Lorex camera system’s DVR or NVR has an HDMI output port. Connect one end of the HDMI cable to the HDMI output port on your Lorex camera system’s DVR or NVR. Connect the other end of the HDMI cable to an available HDMI input port on your smart TV. Use your smart TV remote to select the corresponding HDMI input source that matches the HDMI port you connected the cable to.
How do I view Lorex cameras on multiple devices?
How to add users
- Launch the Lorex Home app, then tap Device Settings.
- Scroll all the way down, then tap Share Device.
- Tap the Add User button or the plus (+) icon at the top rightmost corner of the screen.
- NOTE: The user must have a registered Lorex Home account.
Locate your Lorex camera system’s IP address. This information is normally in the camera’s settings menu or Lorex app. Enter your camera system’s IP address into a web browser on each device. View your cameras using the web-based interface using your camera system credentials.
Register for Lorex Cloud on the website. Connect cameras to Lorex Cloud via the camera settings menu or Lorex app. Install the Lorex Cloud app on each device or visit the website in a browser. Enter your Lorex Cloud account on each device to access your cameras sim.
Install Lorex on each device you want to utilize. Use your Lorex account to log in. Create an account on Lorex’s website or app. Enter the system name, IP address, port number, username, and password to add your Lorex camera system to each device. Once your camera system is installed, each device can access its cameras individually for simultaneous viewing.
You can quickly configure Lorex cameras to be viewed on smartphones, tablets, and PCs. Lorex offers many solutions for multi-device camera viewing.
What is the range of Lorex cameras?
Understanding Wireless Range
In a closed environment, such as inside a house, the wireless camera range is between 100 to 165 feet.
Wired Analog Cameras
Wired analog cameras from Lorex typically use coaxial or Ethernet cables to transmit video signals. The range of wired analog cameras is primarily limited by the length of the cable used. In general, using high-quality cables, such as RG59 or CAT5e, can allow transmission distances of up to 1,000 feet (305 meters) without significant signal degradation. However, it’s important to note that longer cable runs may require signal boosters or video baluns to maintain video quality.
Wired IP Cameras
Wired IP cameras from Lorex utilize network cables (such as CAT5e or CAT6) to transmit video and data over an Ethernet network. The range of wired IP cameras is determined by the limitations of the network infrastructure. With standard Ethernet cables, the maximum transmission distance for wired IP cameras is approximately 328 feet (100 meters). However, by using network switches or Ethernet extenders, the range can be extended further, allowing for longer cable runs.
Wireless Cameras
Lorex offers wireless cameras that utilize Wi-Fi or other wireless technologies for video transmission. The range of wireless cameras can vary depending on factors such as the environment, obstructions, and interference from other wireless devices. In general, Lorex wireless cameras have a typical range of around 150 to 300 feet (45 to 90 meters) in an open space without obstructions. However, the actual range experienced may be shorter if there are walls, objects, or interference sources between the camera and the receiver.

Conclusion
Lorex cameras on your PC provides a convenient and centralized way to monitor your property, ensuring enhanced security and peace of mind. By following the steps outlined in this guide, you can seamlessly connect your Lorex camera system to your local network and utilize the appropriate software to view live video feeds, review recorded events, and manage camera settings directly from your computer.
The ability to view Lorex cameras on your PC offers several advantages, including a larger screen size for a more detailed view, the flexibility to multitask while monitoring, and easier recording and archiving of video footage. Whether you’re keeping an eye on your home, office, or any other location, this method allows for a comprehensive and streamlined surveillance experience.
Lorex cameras on your PC, you gain the advantage of a larger screen size and the ability to multitask. Whether you’re monitoring your home, office, or any other location, the convenience of accessing your cameras from a centralized platform simplifies the surveillance process. Additionally, PC-based viewing allows for easier recording and archiving of video footage, enabling you to review past events or incidents whenever needed.

