Introduction
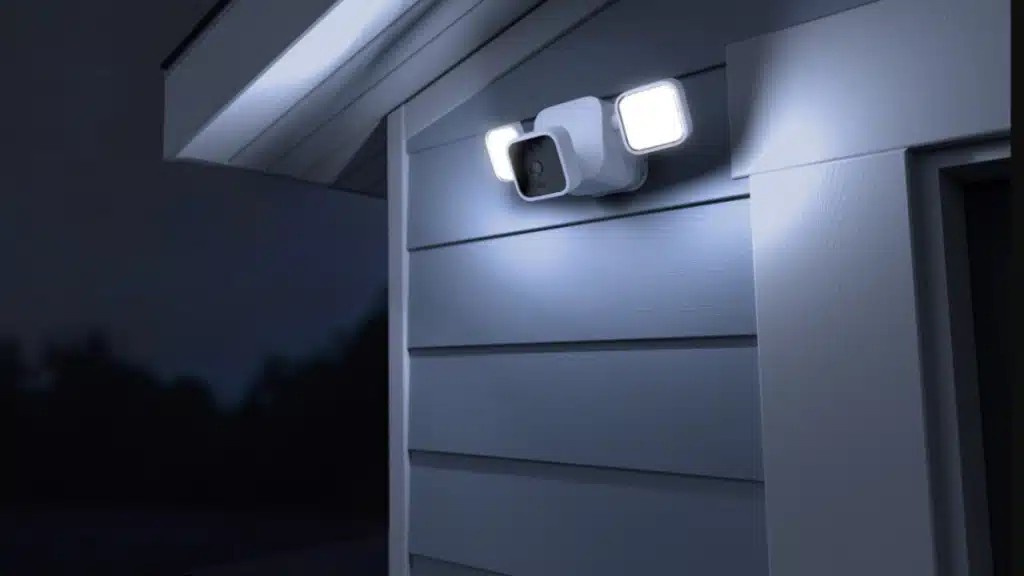
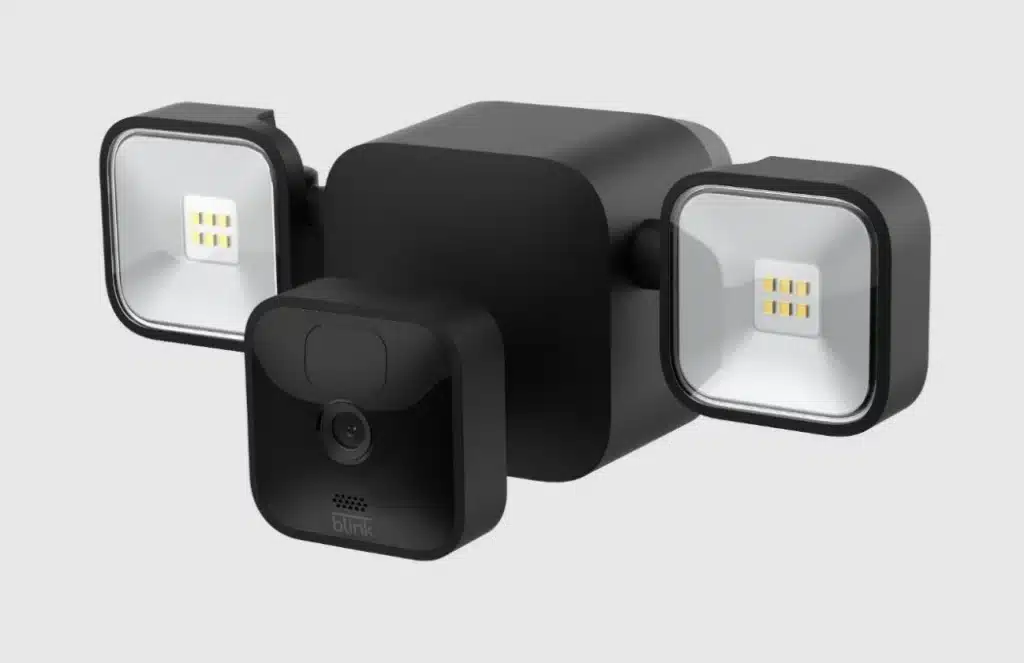
This cutting-edge device combines the benefits of a high-definition security camera with a powerful LED floodlight, offering a comprehensive security solution for your property.
Whether you’re a tech-savvy homeowner or a first-time user, our easy-to-follow instructions will ensure a smooth installation process, giving you peace of mind and added protection for your home. From its advanced motion detection capabilities to its two-way audio communication, you’ll learn how this intelligent device enhances the security of your home and enables you to monitor any activity in real-time, day or night.
Whether it’s ensuring a stable Wi-Fi connection or finding the perfect location for mounting the floodlight blink camera, we’ll cover all the crucial aspects to consider before starting. Blink Floodlight Camera Setup, The main part of the guide will focus on the setup process itself. Provide clear and concise instructions to sync the camera with the Blink app, create an account, and customize the settings to suit your preferences. Additionally, troubleshooting tips will be provided for common issues that may arise during the setup.

How do I get my Blink Floodlight to work?
Your Blink Floodlight Mount uses 4 alkaline D-cell batteries to operate and comes preinstalled in the mount. Remove the pull tab in the battery compartment to activate power to the Floodlight Mount. To access or replace the batteries, dismount the device and twist the back cover open to access the battery compartment.
Setting up and getting your Blink Floodlight Camera to work is a straightforward process that ensures your property’s enhanced security. Whether you’ve just purchased the camera or need assistance troubleshooting, this step-by-step guide will help you get it up and running in no time.
Unboxing and Preparation
To get started, unpack your Blink Floodlight Camera and double check that everything is there. If the camera’s battery isn’t already charged, please do so. It’s important to find a good mounting location that gives you a clear view of the region you’re keeping tabs on.
Download the Blink App
Visit the app store on your smartphone (iOS or Android) and download the Blink app. Create an account or log in if you already have one.
Syncing the Camera
Open the Blink app, tap the “+” icon to add a new device, and select “Blink Floodlight Camera.” Follow the on-screen instructions to sync the camera with your app via Bluetooth.
Connect to Wi-Fi
The app will guide you through connecting the camera to your Wi-Fi network. Ensure your Wi-Fi signal is strong and stable to maintain a reliable connection.
Mount the Camera
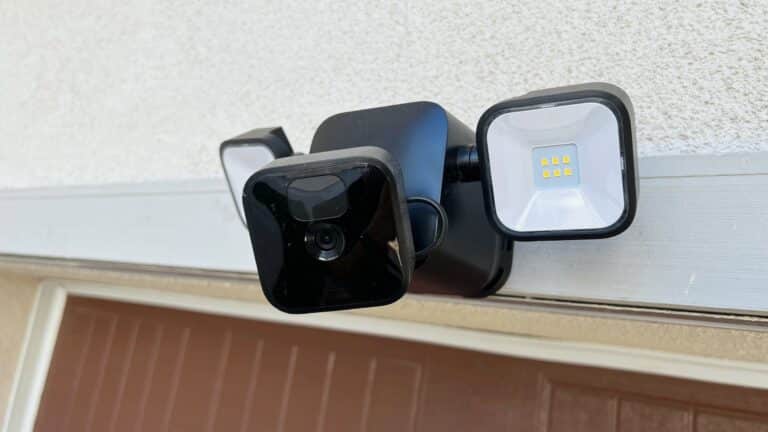
Using the provided mounting bracket and screws, securely mount the Blink Floodlight Camera in your chosen location. Adjust the angle for the best view.
Adjust Settings
Customize your camera’s settings through the app. Set up motion detection zones, notification preferences, and recording length to suit your needs.
Testing and Troubleshooting
After setup, test the camera’s functionality by triggering motion events or manually checking the live feed. If you encounter any issues, consult the Blink app’s troubleshooting section or the official Blink website for assistance.
Why is my Blink Floodlight not detecting?
Make sure that there are always three bars for it to work properly. Otherwise, it means the strength of the internet connection is insufficient, which might cause some delays in connection. This will also affect the Blink Sync Module, causing motion detection to be faulty.
A Blink Floodlight Camera provides reliable and advanced motion detection, enhancing the security of your property. However, there might be instances when you notice that your camera is not detecting motion as expected. Several factors could contribute to this issue, and in this guide, we’ll explore some common reasons and potential solutions to get your Blink Floodlight Camera back on track.
Camera Placement
Objects like branches, leaves, or spider webs in front of the camera lens might interfere with motion detection.
Motion Detection Settings
Check your camera’s motion detection settings through the Blink app. Adjust the sensitivity and motion zones to avoid false triggers from distant movements or non-critical areas.
Wi-Fi Connection
A weak or unstable Wi-Fi connection can affect the camera’s ability to communicate with the app and the Blink server. Verify that your camera has a strong and stable Wi-Fi signal.
Firmware Updates
Ensure that your Blink Floodlight Camera’s firmware is up to date. Regularly check for and apply firmware updates through the Blink app to access the latest features and improvements.
Battery Level
If your Blink camera is battery-powered, a low battery charge might impact its performance. Check the battery level through the app and recharge or replace it if necessary.
Infrared Light Interference
Certain light sources or reflections might trigger the camera’s infrared sensors unintentionally. Ensure there are no bright light sources directly facing the camera.
Can Blink Floodlight work without Wi-Fi?
Without an internet connection, this data exchange is not possible. Note: The Blink Mini, Wired Floodlight, and Video Doorbell do not require a Sync Module to function, but do require a local Wi-Fi signal.
The Blink Floodlight Camera heavily relies on a stable Wi-Fi connection to function properly and provide its full range of features. As a result, it cannot operate without Wi-Fi access. Here are some key reasons why the Blink Floodlight Camera requires Wi-Fi:
Live Streaming and Alerts
The Blink app lets you stream live video from the Blink Floodlight Camera to your phone or other devices that are linked. Movement alerts and notifications are also sent when activity is noticed. Both of these functions need to be connected to the internet, which can be done through Wi-Fi.
Cloud Storage
Blink Floodlight Cameras store recorded video clips in the Blink cloud for easy access and review. Without Wi-Fi, the camera cannot upload the footage to the cloud, rendering this vital feature non-functional.
Firmware Updates
Blink frequently releases firmware updates to improve camera performance, add new features, and address potential security vulnerabilities.
App Control and Customization
The Blink app is the central hub for managing your camera, adjusting settings, and customizing its behavior. To access these features and remotely control the camera, you need to connect to it via Wi-Fi.
Two-Way Audio
The Blink Floodlight Camera includes two-way audio functionality, allowing you to communicate with visitors or potential intruders remotely. This feature relies on a Wi-Fi connection for seamless communication.

Is the blink floodlight hardwired?
The Blink Wired Floodlight Camera is a hardwired floodlight and camera that connects to your Wi-Fi and brings you 1080p HD video, two-way talk, and live view in the Blink mobile app. The Wired Floodlight Camera features 2600 lumens of LED lighting, night view in color, enhanced motion detection, and a siren.
There is a line that runs through the Blink Floodlight Camera. Some other Blink cameras run on batteries, but the Blink Floodlight Camera needs to be directly connected to power. Set up a Blink floodlight camera With this hardwiring feature, there is always power, so you don’t have to change the batteries often. This means that spying and functionality can continue without interruption.
The hardwiring process involves connecting the Blink Floodlight Camera directly to your home’s electrical wiring system. This typically requires the assistance of a qualified electrician to ensure a safe and proper installation. Here are some key points to consider regarding the hardwiring of the Blink Floodlight Camera:
Professional Installation
To hardwire the camera, you’ll need a professional electrician to install it correctly. They will ensure that the wiring is properly connected and that all electrical safety measures are followed.
Power Source
The camera needs to be connected to a suitable power source, such as an outdoor electrical outlet or junction box. This will provide a constant flow of electricity to keep the camera operational.
Floodlight Functionality
Hardwired connections power the camera and LED floodlights. This allows the floodlights to illuminate the area when motion is detected, improving camera surveillance.
Weatherproofing
The Blink Floodlight Camera is built to withstand the elements and may be used in a variety of settings. However, proper weatherproofing measures will ensure that the electrical connections are safe from the effects of moisture and other external variables.
Does blink floodlight turn on with motion?
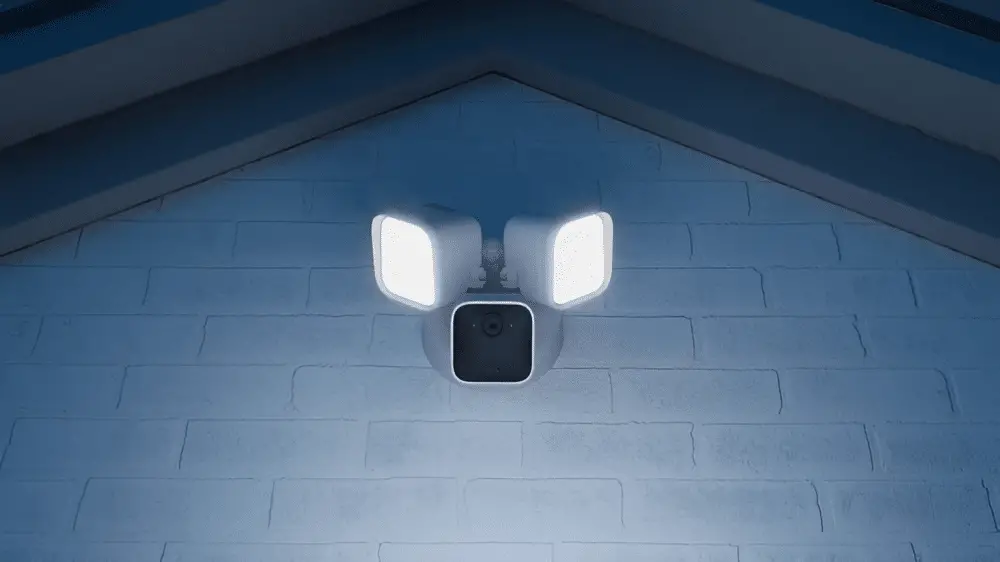
The floodlight can be set to turn on when motion is detected. When motion is detected, the Blink Floodlight Camera automatically turns on. The Blink Floodlight Camera’s ability to activate its LED floodlights in response to motion is one of its strongest features.
The camera’s motion sensors will turn on the floodlights if something moves within the camera’s area of view, such as a person or an animal.
Enhanced Visibility
The floodlights illuminate the area, ensuring clear and detailed video footage, even in low-light conditions. This is crucial for identifying people or objects captured in the camera’s view.
Deterrent Effect
Fast, powerful floodlights can scare off burglars and make them depart. Floodlights and visible cameras help deter break-ins and trespassers.
Real-Time Alerts
The Blink Floodlight Camera has the ability to provide instantaneous motion alerts to your connected devices via the Blink app.
Customizable Motion Zones
The Blink app allows you to customize the motion detection zones, so you can focus on specific areas of interest and reduce false alerts triggered by non-critical movement.
How do I reset my blink floodlight?
How to reset most Blink Cameras
- Step 1: Press and hold the reset button on the side of the Sync Module until the LED blinks red.
- Step 2: Release the button and wait for the LED to blink green and blue.
- Step 3: The Sync Module is now in set up mode.
- Step 4: Delete the Sync Module from your Blink app.
Resetting your Blink Floodlight Camera may be necessary if you encounter issues with its operation or need to set it up again from scratch. Blink Floodlight Camera Setup, Here’s a step-by-step guide on how to reset your Blink Floodlight Camera:
Power Off the Camera
Start by turning off the power to your Blink Floodlight Camera. If the camera is hardwired, you can turn off the power supply from the electrical outlet or circuit breaker. If it is battery-powered, remove the batteries.
Wait for 10 Seconds
Give the camera a few seconds to fully power down. This brief waiting period allows the camera’s internal components to reset completely.
Power On the Camera
After waiting for about 10 seconds, restore power to the Blink Floodlight Camera. If the camera is hardwired, plug it back into the electrical outlet or turn on the circuit breaker. For battery-powered cameras, insert the batteries again.
Observe LED Indicators
Once the camera powers on, observe its LED indicators. You may see different LED patterns or colors during the reset process. Refer to the Blink Floodlight Camera’s user manual for specific LED indicator meanings.
Reset via the Sync Button
If the camera’s LED indicators don’t show any response or you need to perform a full factory reset, locate the Sync button on the camera. Blink Floodlight Camera Setup, Press and hold the Sync button for about 20 seconds until the LED indicators flash rapidly.
Reconnect and Set Up
After resetting the camera, you’ll need to set it up again using the Blink app. Follow the initial setup process, including syncing the camera with the app, connecting it to your Wi-Fi network, and customizing settings as desired.
What is the range of Blink Floodlight camera?
The best range of detection is within 5 to 20 feet (about 1.5 to 6m) from the camera. By placing your camera higher off of the ground, you can avoid smaller animals causing motion alerts.
The range of the Blink Floodlight Camera refers to the maximum distance between the camera and the sync module (the device that connects the camera to your home Wi-Fi network). Blink Floodlight Camera Setup, The sync module is an essential component that enables communication between the camera and the Blink app on your smartphone or other connected devices. Understanding the range is crucial for ensuring a reliable connection and proper functioning of the camera.
The typical range of the Blink Floodlight Camera is around 100 feet (approximately 30 meters) in an open space without obstructions. However, the actual range can vary depending on various factors, including:
Obstructions: Walls, doors, and other obstacles can reduce the effective range of the camera. The more barriers between the camera and the sync module, the shorter the range may become.
Wi-Fi Signal Strength: A strong and stable Wi-Fi signal is necessary for the camera to communicate with the sync module and the Blink app.
Interference: Other electronic devices or Wi-Fi networks in the vicinity can cause interference, affecting the camera’s range and performance.
Environmental Conditions: Outdoor factors such as weather conditions and interference from neighboring buildings can impact the camera’s range.
How do I start the setup process for my Blink Floodlight Camera?
Starting the setup process for your Blink Floodlight Camera is a straightforward and user-friendly procedure. Blink Floodlight Camera Setup, To get started, follow these steps:
Unbox the Camera
First, check that the camera, mounting bracket, screws, and any other accessories that came with your Blink Floodlight Camera are all in the box.
Download the Blink App
Visit the app store on your smartphone (available for iOS and Android) and download the Blink app. The app will be your central hub for managing and controlling your Blink Floodlight Camera.
Create an Account or Log In
If you’re a new Blink user, create an account by providing the required information. If you already have a Blink account, simply log in using your existing credentials.
Add a New Device
Open the Blink app and tap on the “+” icon to add a new device. From the list of available Blink devices, select “Blink Floodlight Camera” to proceed.
Sync the Camera
The app will prompt you to sync the camera with your smartphone or tablet. Follow the on-screen instructions, which usually involve bringing your smartphone close to the camera and pressing a sync button or scanning a QR code.
Connect to Wi-Fi
After syncing the camera, the app will guide you through the process of connecting the Blink Floodlight Camera to your home Wi-Fi network. Blink Floodlight Camera Setup, Choose your Wi-Fi network from the available list, enter the Wi-Fi password, and let the camera connect to the network.
Mount the Camera
After the camera has been successfully linked to Wi-Fi, it may be mounted using the included bracket and screws.

Conclusion
High-definition video capture and a bright LED lighting make the Blink lighting Camera a top home surveillance choice.
The two-way audio communication feature allows you to interact remotely with visitors or potential intruders, acting as an extra deterrent to potential threats. Moreover, the camera’s night vision functionality ensures uninterrupted surveillance, even in low-light conditions, providing you with round-the-clock security. By following our step-by-step setup instructions, you have configured the Blink Floodlight Camera to meet your specific requirements. From customizing motion zones to adjusting notification settings, you are now fully in control of how the camera operates, tailoring it to suit your lifestyle.
Remember to maintain a stable Wi-Fi connection and regularly update the camera’s firmware to ensure optimal performance. Blink Floodlight Camera Setup, take advantage of the Blink app to access live feeds and review recorded footage, giving you peace of mind whether you’re at home or away. With your Blink Floodlight Camera now up and running, you can rest assured that your home is under vigilant protection. Embrace the convenience and efficiency of smart home security, knowing that you have taken proactive measures to safeguard your loved ones and belongings.

