Introduction
The SimpliSafe Outdoor Camera comes with a portable battery pack, which makes it easy to move around and set up without wires. Depending on how the camera is used and other things, the battery pack can power the camera for a long time. When the camera’s battery level gets low, it’s time to charge it to keep it working well and reliably.
The battery of the SimpliSafe Outdoor Camera works well. Whether you’re a first-time user or just changed the battery pack, this guide will help you understand how to charge your security camera and make sure it works all the time. There is a charge port on the SimpliSafe Outdoor Camera where you can plug in the power adapter. Find the camera’s charging port, which is generally at the back or bottom of the device.
Some SimpliSafe Outdoor Camera models may require you to remove the battery pack from the camera before charging it. If this is the case, follow the instructions provided in the camera’s user manual or consult SimpliSafe’s customer support for guidance on safely removing the battery. Please note that the charging process may vary slightly depending on the specific model of the SimpliSafe Outdoor Camera you have. It is always SimpliSafe documentation or consult their customer support for detailed instructions tailored to your device.

How do I recharge my SimpliSafe camera?
How do I charge my SimpliSafe Outdoor Camera? The SimpliSafe Outdoor Camera comes with a USB charging cable. It can take up to five hours to charge all the way. You can also purchase a solar accessory that keeps the camera charged so you don’t need to mess with it.
Familiarize Yourself with the Camera
Before you start charging, take a moment to learn about the type of your SimpliSafe camera. Find the place where the batteries go in the camera. This is usually on the back or bottom of the device. Take note of any specific directions SimpliSafe gives you about how to charge your camera model.
Remove the Battery
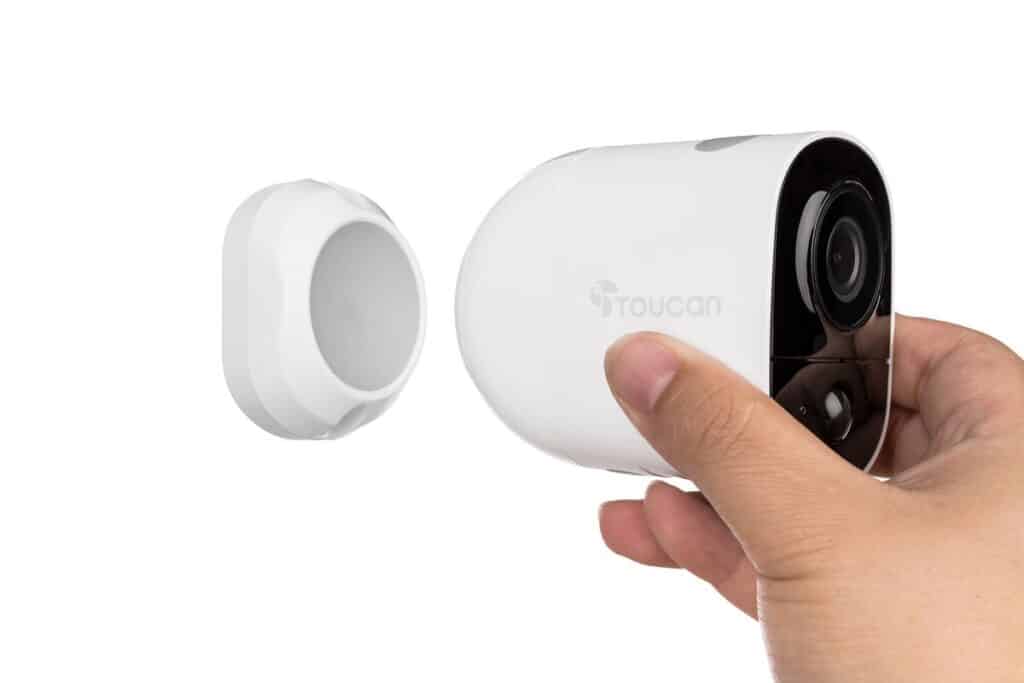
To recharge the SimpliSafe camera, you need to detach the battery from the camera itself. Depending on the model, this may involve pressing a release button, sliding the battery out, or unscrewing a panel. Carefully follow the manufacturer’s instructions to ensure a smooth removal process without damaging the camera or battery.
Connect the Battery to the Charger
Once the battery is detached, connect it to the provided charger. Ensure that the charger and battery connections align correctly and securely. SimpliSafe typically supplies a charger specifically designed for their cameras, ensuring compatibility and optimal charging performance.
Plug in the Charger
After connecting the battery to the charger, plug the charger into a standard power outlet. Ensure the power source is functioning correctly and providing electricity. Verify that the charger’s indicator light confirms it is receiving power.
How do I know when SimpliSafe battery is charged?
To check the status of your battery:
- Open the SimpliSafe Mobile App.
- Navigate to the three-bar menu on the top left corner of the app.
- Select My System.
- Choose Camera Settings.
- The battery indicator will be displayed to the right of each camera.
- For iOS users, tap into the camera you wish to see the battery percentage for.
Charging Indicator Light
Most SimpliSafe devices feature a built-in charging indicator light, which helps you determine the battery’s charging status. When you connect your device to a power source, the indicator light will usually illuminate in a specific color or pattern to indicate the charging process.
Initial Charging Period
When you first set up your SimpliSafe system or replace the battery, it’s important to allow for an initial charging period. The initial charge typically takes several hours to complete. During this time, the battery indicator light may blink or show a specific color to indicate that the device is charging.
Solid Green Light
Once the initial charging period is complete, and the battery is fully charged, the charging indicator light on your SimpliSafe device should display a solid green light. This indicates that the battery is charged and ready to use. Keep in mind that the duration of the initial charge may vary depending on the device and battery type, so it’s essential to consult the user manual or product documentation for specific details.
Battery Status on the Keypad or Mobile App
Another way to determine the battery’s charge level is through the SimpliSafe keypad or mobile app. The keypad often displays the battery status, indicating whether it is charging or fully charged. Similarly, if you have the SimpliSafe mobile app installed on your smartphone, you can check the battery status remotely.
Battery Life Indicator
SimpliSafe devices may also include a battery life indicator that provides an estimate of how much charge is left in the battery. This feature helps you monitor the battery’s level and plan for a recharge or replacement when necessary. Refer to the user manual or the SimpliSafe website for specific instructions on accessing the battery life indicator.
How long does it take to charge a SimpliSafe outdoor camera?
About five hours
Get your SimpliSafe Wireless Outdoor Security Camera up and running again in minutes with a back up battery that recharges in about five hours.
Battery Life and Charging Frequency
SimpliSafe outdoor cameras come with rechargeable batteries that offer a certain lifespan before needing to be recharged. The battery life varies depending on factors such as camera usage, environmental conditions, and settings. The specific product documentation or SimpliSafe’s official website to determine the expected battery life of your outdoor camera model.
Initial Charging Period
When you first set up your SimpliSafe outdoor camera or replace the battery, it’s crucial to allow for an initial charging period. This initial charge ensures that the battery reaches its maximum capacity and provides optimal performance. The duration of the initial charge may vary based on the camera model and battery type. As a general guideline, it is to charge the camera for at least 12 to 24 hours before initial use.
Charging Methods
SimpliSafe outdoor cameras typically come with a USB charging cable and a power adapter for convenient charging. To charge your camera, connect the USB cable to the camera’s charging port and plug the other end into a power source, such as a wall outlet or a USB port on a computer. Ensure that the power source provides a stable power supply to facilitate efficient charging.
Charging Time
The charging time for SimpliSafe outdoor cameras can vary depending on the battery capacity, the remaining charge in the battery, and the power output of the charging source. Generally, it can take anywhere from 4 to 8 hours to fully charge a SimpliSafe outdoor camera battery. However, this estimate may vary based on factors mentioned earlier. It’s essential to keep an eye on the camera’s charging indicator light or battery status to determine when it is fully charged.
How is the SimpliSafe outdoor camera powered?
Battery Powered
The SimpliSafe Outdoor Camera is wireless, meaning it runs on battery power. Luckily that battery can last between three and six months between charges, depending on usage.
Battery-Powered Operation
The SimpliSafe outdoor camera is primarily powered by a rechargeable battery. This wireless design offers significant advantages, including flexibility in camera placement and ease of installation. The battery-powered operation eliminates the need for running wires or relying on a constant power supply, allowing you to place the camera in various outdoor locations.
Rechargeable Battery Life
The battery life of the SimpliSafe outdoor camera can vary based on usage, settings, and environmental conditions. The manufacturer provides an estimated battery life, which you can find in the product documentation or on the SimpliSafe website. The battery typically lasts for several months before requiring recharging, but it’s important to note that specific factors can impact battery life, such as the number of motion events and the camera’s activation frequency.
USB Charging Cable
To recharge the SimpliSafe outdoor camera’s battery, the package includes a USB charging cable and a power adapter. The USB cable connects to the camera’s charging port, while the other end plugs into a power source, such as a wall outlet or a USB port on a computer. This convenient charging method ensures that you can easily recharge the battery whenever necessary.
Solar Panel Power Option
For those seeking a sustainable and energy-efficient power source, SimpliSafe offers an optional solar panel accessory for the outdoor camera. The solar panel is designed to harness solar energy and convert it into power to charge the camera’s battery. By utilizing solar power, you can extend the battery life and reduce the frequency of manual recharging. This is particularly useful in areas with abundant sunlight.

Why is my SimpliSafe outdoor camera blinking?
If the camera has a flashing red light, it has incorrect Wi-Fi credentials. This issue arises during setup, ensure that you have entered your Wi-Fi network and password correctly. The camera has previously been set up successfully, the Wi-Fi credentials may have changed.
Power and Charging Status
One common reason for a blinking SimpliSafe outdoor camera is the power and charging status. When the camera’s battery is low or it is in the process of charging, the camera’s LED lights may blink to indicate the charging process. If the battery is completely drained, the camera may blink rapidly until it receives sufficient power.
Camera Setup Mode
The SimpliSafe outdoor camera has a setup mode that enables easy installation and connectivity to the SimpliSafe system. During the setup process, the camera’s LED lights may blink to indicate that it is ready for pairing with the base station or other devices. This blinking pattern typically occurs when you are in the setup or connection phase.
Wi-Fi Connectivity
Blinking lights on the SimpliSafe outdoor camera may also indicate its Wi-Fi connectivity status. When the camera is attempting to connect to the Wi-Fi network, the LED lights may blink at regular intervals. If the camera is unable to establish a stable Wi-Fi connection, the blinking lights may continue until the issue is resolved.
Firmware Update
Periodically, SimpliSafe releases firmware updates to improve the camera’s performance and security features. When a firmware update is available, the camera’s LED lights may blink to indicate that the update is in progress. It’s important to allow the update to complete without interruption to ensure optimal functionality.
Where is the best place to put a SimpliSafe outdoor camera?
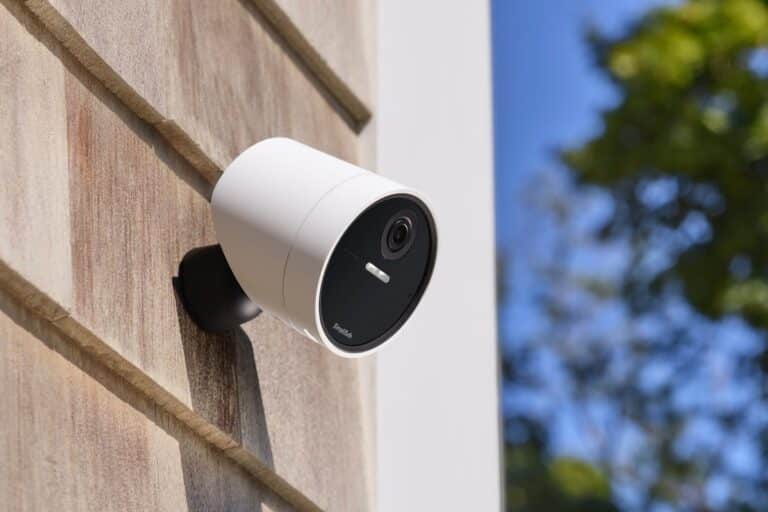
As an example, SimpliSafe typically recommends placing our Wireless Outdoor Security Camera 6-8 feet above the ground at about a 30-degree downward angle. Either way, make sure there’s nothing that can obstruct the view of your camera.
Coverage Area
Before selecting the placement for your outdoor camera, assess the areas you want to monitor. Identify the key points of entry, such as doors, windows, and pathways, where potential intruders may attempt to gain access. Understanding your property’s layout and the areas that require surveillance will help determine the ideal placement for your camera.
Mounting Height
When installing your SimpliSafe outdoor camera, consider the optimal mounting height. Mounting the camera at an appropriate height ensures that it captures a wide field of view while minimizing the risk of vandalism or tampering. A height of around 7 to 9 feet is generally for outdoor camera placement.
Line of Sight
Ensure that your outdoor camera has an unobstructed line of sight to the areas you want to monitor. Avoid placing the camera behind trees, shrubs, or other objects that may block the view or trigger false motion alerts. Clear sightlines enable the camera to capture accurate footage and provide reliable surveillance.
Entry Points and Vulnerable Areas
Strategically position your outdoor camera to focus on entry points and vulnerable areas of your property. Place the camera near doors, windows, garages, or any other potential access points that could be targeted by intruders. By monitoring these areas, you enhance your security and deter potential threats.
Lighting Conditions
Consider the lighting conditions of the intended placement area. While outdoor cameras are designed to perform well in various lighting situations, it is generally beneficial to avoid extreme backlighting or placing the camera in areas with excessive glare. Position the camera in a spot that provides adequate lighting for clear video capture during day and night.
How often do you have to charge the SimpliSafe outdoor camera?
The SimpliSafe Wireless Outdoor Security Camera is 100% wireless and battery operated, with a charge that can last up to 3 – 6 months (depending on usage). You will be alerted by notifications when your battery is low, and you can check the battery status at any time in settings.
The battery life of the SimpliSafe outdoor camera can change depending on how the camera is used, its settings, the weather, and how often motion is detected. You can find an idea of how long the batteries in SimpliSafe’s outdoor cameras will last in the product documentation or on their website. Depending on how and how often you use the SimpliSafe outdoor camera, the battery can last anywhere from a few months to a year.
Usage Patterns
The SimpliSafe outdoor camera’s battery life depends on how often and for how long it is turned on. If your camera is constantly turned on by motion or if you have it set to record continuously, it will use more power and may need to be charged more often. Changing the settings on the camera and making it more sensitive to movements can help save battery life.
Motion Detection Settings
The motion detection settings on the SimpliSafe outdoor camera can be changed so that you can choose the sensitivity and range for catching motion events. By fine-tuning these settings, you can make the camera work better and avoid shooting things you don’t need to, which will save battery life. The key is to find a good mix between recording important events and saving power.
Charging Frequency
The charging frequency for the SimpliSafe outdoor camera depends on the battery life and usage patterns. As a general guideline, you may need to charge the camera’s battery every few months to once a year, depending on how frequently the camera is triggered and the specific camera model you have. It’s important to monitor the battery level regularly and recharge it when necessary to ensure uninterrupted operation.
What is the Wi-Fi range of SimpliSafe outdoor camera?
The camera can sometimes perform poorly if it’s placed too far away from the required base station or Wi-Fi router. Six to eight feet is usually the maximum distance;3 any farther away and you might experience delays in loading the camera’s live stream and preparing motion-activated clips.
Wi-Fi Range Factors
The Wi-Fi range of the SimpliSafe outdoor camera can be influenced by several factors, including the specific camera model, the quality of your Wi-Fi network, the presence of obstacles, and environmental conditions. Understanding these factors will help you determine the optimal placement of your outdoor camera and ensure a strong and stable Wi-Fi connection.
Specific Camera Model
Different SimpliSafe outdoor camera models may have variations in their Wi-Fi range. It is recommended to consult the product documentation or SimpliSafe’s official website to determine the specific Wi-Fi range for your camera model. The manufacturer typically provides information about the approximate range or coverage area for each camera model they offer.
Quality of Wi-Fi Network
The quality and strength of your Wi-Fi network play a significant role in determining the effective range of the SimpliSafe outdoor camera. A robust and high-speed Wi-Fi network with a strong signal will provide better coverage and allow for a greater range. Ensure that your Wi-Fi router is positioned centrally in your home and that it is capable of delivering a reliable signal to the outdoor camera’s intended placement area.
Obstacles and Interference
Obstacles such as walls, floors, and other structures can impact the Wi-Fi signal strength and range. Thick walls, metal objects, or electronic appliances may obstruct or weaken the Wi-Fi signal, reducing the effective range of the outdoor camera. Avoid placing the camera in areas with excessive obstructions to maintain a strong connection.

Conclusion
Use the provided charger and connect it to the battery. Make sure the connections are secure and that the charger is compatible with the battery. Insert the charger into a power outlet. Ensure that the power source is working correctly and that the charger is receiving electricity. Gently detach the battery from the camera by following the specific instructions provided by SimpliSafe. This may involve pressing a release button or sliding the battery out of its compartment.
Leave the battery connected to the security camera for the charging time. This duration may vary depending on the battery’s capacity and the manufacturer’s specifications. It is advisable to follow the suggested charging time to avoid overcharging or damaging the battery. While the battery is charging, keep an eye on the charging indicator provided by the charger or the camera itself. This will allow you to track the progress and ensure that the battery is charging properly.
Once the battery is fully charged, disconnect it from the charger and reinsert it into the camera. Ensure that it is properly aligned and securely placed in the battery compartment. After reinstalling the battery, turn on the camera and check if it functions correctly. Verify that the battery level indicator shows a full charge.

