Introduction
Blink Outdoor camera is an essential step in ensuring optimal placement and functionality for your home security system. By securely attaching your camera to a mount, you can easily position it at the desired angle, height, and location, allowing you to monitor your surroundings effectively. Whether you’re mounting the camera outdoors to keep an eye on your property or indoors for added security
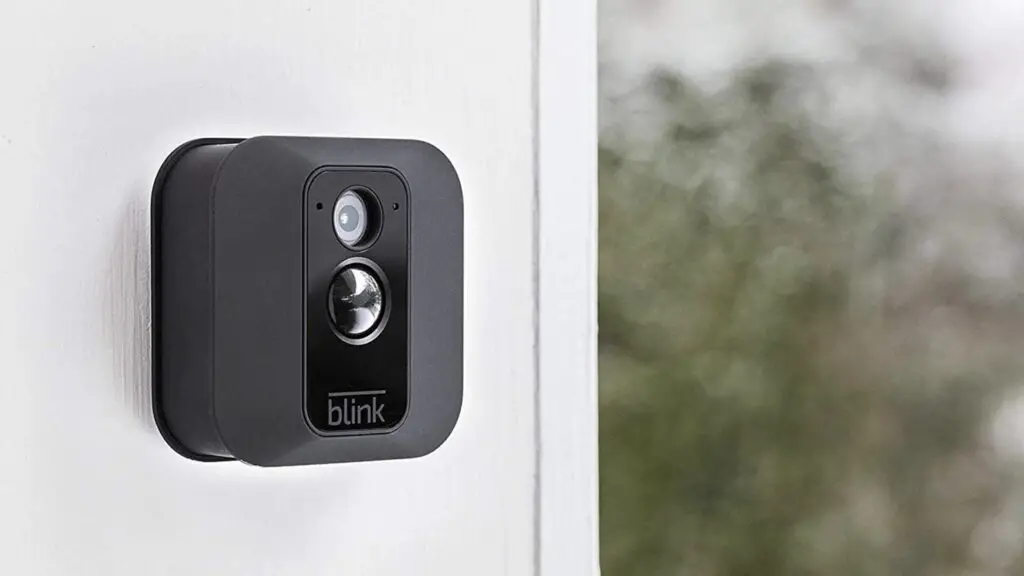
Start by removing the camera from its original stand. To do this, twist the camera counterclockwise until it detaches from the stand. Next, align the mounting hole on the back of the camera with the corresponding hole on the mount. Use the provided screws to fasten the mount blink camera to the mount. Ensure the camera is securely attached and tightly fastened. Align the mount with the pilot holes and use a screwdriver to insert the screws through the mount and into the wall or surface. Tighten the screws securely, but be careful not to overtighten.
If you’re mounting the camera outdoors, clean the mounting surface and remove any dirt or debris. If you’re mounting the camera indoors, use a stud finder to locate a suitable spot on the wall. Hold the mount against the desired location and use a pencil or marker to mark the positions for the mounting holes. Use a level to ensure the mount is straight before marking.

Where do you mount blink outdoor cameras?
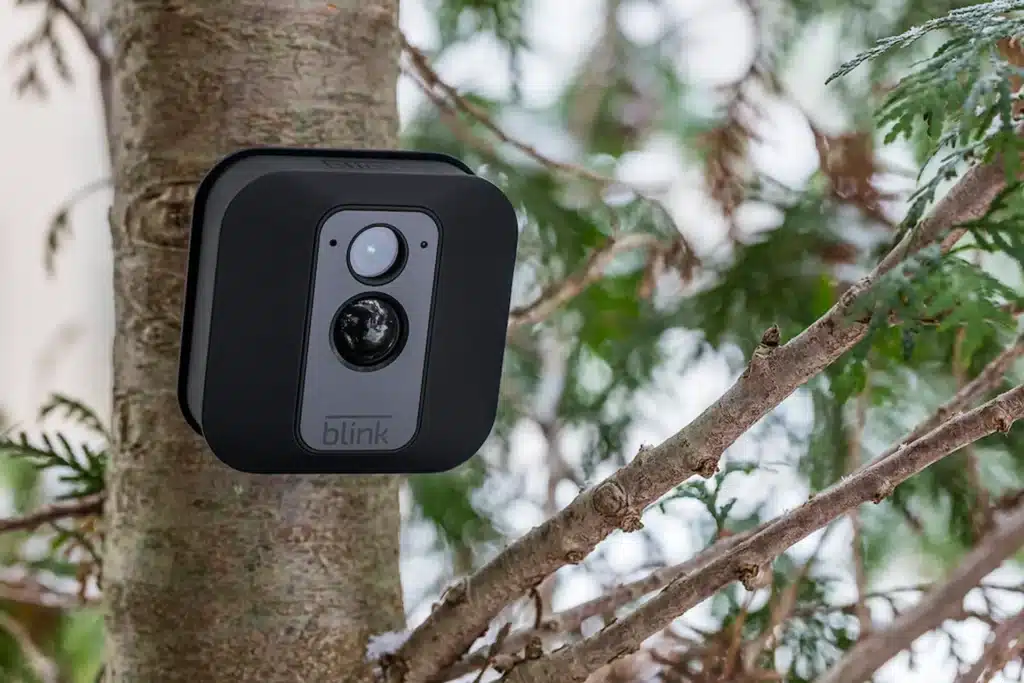
For outdoor cameras, you have a few things to consider when it comes to placing them. For sure you want to cover your doors – the front, back and garage door, if you have one. If you have a fence, you may want to try and catch the gate as well. Then try to cover common areas like the yard and driveway.
Backyard and Patio: If you have a backyard or patio area, consider mounting cameras to monitor these spaces. This is especially important if you have valuable outdoor equipment, a swimming pool, or want to keep an eye on children or pets playing outside. Position the cameras to cover the entire area, including doors leading to the backyard, to maintain a secure perimeter.
Perimeter Coverage: It’s essential to have a clear view of the perimeter of your property. Mount cameras at strategic locations along the exterior walls or fencing, covering vulnerable areas that might provide access to your property. This could include side gates, windows, or any areas where trespassing is a concern.
Points of Interest: Identify any specific areas or objects of interest that you want to monitor closely. This could include a valuable car parked in the driveway, a shed storing expensive equipment, or a specific part of your garden that needs extra surveillance. Mounting cameras near these points of interest ensures focused coverage and increased security.
Blind Spots: Take note of any blind spots or areas where natural surveillance is limited. These areas might include corners of your property, obscured pathways, or secluded spots. By strategically mounting cameras to cover these blind spots, you can eliminate vulnerabilities and ensure comprehensive surveillance coverage.
Can I stick Blink camera to wall?
INSTALLED WITHIN A FEW MINUTES: Easy to install wall mount for your Blink Mini Indoor camera. Simply remove the safety tape from the back of the holder, and place it in your desired area and position, let it sit there for at least 6 hours then slide your Blink Mini camera.
Adhesive Mounts: Blink offers adhesive mounts specifically designed for their cameras. These mounts typically come with a strong adhesive backing that securely attaches to a variety of surfaces, including walls, ceilings, and other smooth surfaces. The adhesive is designed to provide reliable strength and durability.
Surface Preparation: Before sticking the adhesive mount to the wall, it’s essential to ensure the surface is clean and dry. Remove any dust, dirt, or debris from the area where you plan to mount the camera. Use a mild cleaning solution if necessary and allow the surface to dry completely before applying the adhesive mount.
Mounting Process: Peel off the protective backing from the adhesive mount to expose the adhesive side. Align the mount with the desired location on the wall and press firmly against it. Apply pressure for a few seconds to ensure a secure bond. Some adhesive mounts may also include additional clips or hooks to help secure the camera’s cable.
Camera Attachment: Once the adhesive mount is securely attached to the wall, you can proceed to attach the Blink camera. Twist the camera clockwise onto the mount until it locks into place. Ensure that the camera is securely attached and properly aligned.
What is the maximum distance for Blink outdoor camera?
100 ft. away
How far away can camera units be placed? Under normal circumstances, the Sync Module is capable of communicating with Blink cameras up to 100 ft. away in any direction. We recommend keeping the Sync Module near your wireless router for the best signal strength.
Line of Sight and Obstacles: Walls, trees, and buildings can reduce the Blink outdoor camera’s effective range. For a stronger signal, the camera and Wi-Fi router should be visible. Thick walls or objects in the signal path can restrict range and cause connectivity issues. Consider these variables while choosing a camera mount.
Camera Model and Generation: Your Blink outdoor camera’s maximum range may vary. The best source for your camera’s maximum range is the manufacturer’s website or the camera’s manual.
Wi-Fi Range Extenders: Use range extenders or mesh Wi-Fi systems to reach your Blink exterior cameras. These devices boost your Wi-Fi signal, letting you position cameras farther from the router.
Signal Strength Testing: Before putting your Blink exterior cameras, test the Wi-Fi signal strength. Check signal strength around your property with your smartphone or a Wi-Fi signal strength analyzer app. This can help you locate weak or irregular signals and choose camera location.
How high should outdoor camera mounting be?
About nine feet off the ground outside and seven feet inside is a good rule-of-thumb for mounting security cameras. One of the most common mistakes people make when mounting their cameras is to put them too high or too low.
Purpose of Surveillance: Consider the specific purpose for installing the outdoor camera. If your goal is to monitor a wide area, such as a backyard or driveway, a higher mounting height may be preferable to capture a broader field of view. For more focused surveillance, such as monitoring entry points, a lower mounting height may be appropriate.
Camera Field of View: Consult the camera’s specifications and determine its field of view (FOV). The FOV indicates the angle and coverage provided by the camera lens. Mount the camera at a height that allows it to capture the desired area effectively without any significant blind spots. Adjust the camera angle as necessary to ensure optimal coverage.
Camera Reach and Distance: Consider the range and reach of the camera when determining the mounting height. Ensure that the camera’s view encompasses the areas you want to monitor without compromising clarity or capturing excessive background footage. Take into account the camera’s resolution and zoom capabilities to determine the appropriate height for capturing the level of detail you require.
Accessibility and Tampering: Mount the outdoor camera at a height that minimizes the risk of tampering or vandalism. Placing the camera out of reach makes it more difficult for intruders or mischievous individuals to tamper with or disable the camera. Additionally, consider the accessibility of the camera for maintenance or adjustments, ensuring that it can be easily accessed when needed.

Does the blink outdoor camera record 24 7?
Blink cameras do not offer continuous recording, though you can leave the system armed for any interval of time.
The Blink camera’s Sync Module transmits motion event footage to the cloud. Blink’s app and website store motion-activated clips for free. Your subscription plan or free storage determines how long these clips are saved.
Blink Outdoor does not capture and keep footage 24/7 like standard security systems. Instead, it uses motion-triggered recording to capture occurrences of interest, such as movement near your home’s entrance points, driveway activities, or other monitored areas.
Motion-activated recording saves battery life by not continuously recording and sending data to the cloud. It also makes it easier to review specific occurrences rather than hours of continuous recording.
The “Blink Subscription Plan” allows continuous video recording for surveillance purposes. Blink Outdoor cameras can record constantly for an additional fee with a subscription plan.
Can blink outdoor cameras see at night?
Yes, Blink cameras work at night, thanks to the IR LED embedded into the device. This helps your camera capture a clear black-and-white image even during low light conditions.
Range and Coverage: The range of night vision on Blink Outdoor cameras can vary depending on factors such as ambient light levels and the specific camera model. Generally, the cameras are designed to provide night vision coverage of up to 20 to 30 feet (6 to 9 meters). This range should be sufficient for most outdoor surveillance needs, such as monitoring entryways, driveways, or other areas around your property.
Image Quality: While night vision enables the camera to capture footage in low-light conditions, it’s important to note that the image quality may differ from daytime recordings. Night vision footage is typically black and white and may have a slightly grainy or less detailed appearance compared to daytime recordings. However, Blink Outdoor cameras are designed to provide clear and recognizable images even in low-light situations.
Adjusting Camera Placement: To optimize the night vision performance of your Blink Outdoor camera, consider the placement of the camera in relation to potential obstructions and light sources. Avoid placing the camera too close to objects that could reflect or block the infrared light, as this may affect the image quality. Additionally, ensure that the camera is positioned to capture the desired areas and angles in low-light conditions.
Monitoring and Playback: The night vision footage captured by Blink Outdoor cameras is stored in the cloud and can be accessed through the Blink app or website. You can view, download, or share the recorded clips, allowing you to monitor your property during the night or review any detected events.
Do you need a base station for Blink outdoor camera?
You don’t need a base station with Blink, but you’ll need a Sync Module for some of the cameras it offers — particularly those that are battery-operated and wire-free. You can read our Blink security camera review for a full overview of every Blink camera available.
Sync Module Compatibility: While a base station is not necessary for Blink Outdoor cameras, you may still choose to use a Blink Sync Module if you have one available. The Sync Module is a device used to connect multiple Blink cameras to your network and centralize their management. However, it is not a requirement for the Blink Outdoor camera to function.
Direct Wi-Fi Connection: Blink Outdoor cameras connect directly to your home Wi-Fi network, just like any other Wi-Fi enabled device. During the setup process, you will need to provide the camera with your Wi-Fi network credentials, and it will establish a direct connection to your network for communication and video transmission.
Blink App and Cloud Storage: The Blink Outdoor cameras are integrated with the Blink app, which allows you to manage and access your camera’s settings, view live feeds, and review recorded clips. The footage captured by the Blink Outdoor cameras is stored in the cloud, and you can access it through the Blink app or website, regardless of whether you have a Sync Module.
Scalability: The Blink Outdoor camera system is scalable, allowing you to add multiple cameras to your network as needed. Each camera can be set up individually and connected to your Wi-Fi network independently, providing flexibility in expanding your outdoor surveillance coverage.
How is Blink mounted?
The Camera Mount includes a right-angle adapter. The mounting point fits directly into the back cover of Blink cameras. At first, the fit can be tight and you may have to press firmly to connect the mount. It also fits into the right-angle adapter and Blink accessories.
Select a Suitable Location: Identify the area you want to monitor and select a suitable location for mounting the Blink camera. Consider factors such as the field of view, accessibility, potential obstructions, and the purpose of surveillance.
Gather the Required Tools: Depending on the mounting method, you may need tools such as a screwdriver, screws, anchors, or adhesive mounts. Ensure you have the necessary tools on hand before proceeding.
Remove the Camera from its Stand: If your Blink camera is currently attached to its stand, carefully remove it by twisting the camera counterclockwise until it detaches from the stand. Keep the camera and any accompanying components or cables accessible for the mounting process.
Choose the Mounting Method: Blink cameras offer various mounting options to accommodate different needs. Depending on the model and your preferences, you can choose between screw mounts, adhesive mounts, or other compatible mounting accessories.
Position the Mounting Plate: Hold the mounting plate against the desired location on the wall or surface. Use a pencil or marker to mark the positions for the mounting holes.
Drill Pilot Holes: Using an appropriate drill bit, drill pilot holes at the marked positions. Ensure that the drill bit size matches the size of the screws you will be using.
Attach the Mounting Plate: Align the mounting plate with the pilot holes and secure it to the wall using screws. Tighten the screws until the mounting plate is firmly attached.

Conclusion
The process involves attaching the camera to the mount, carefully selecting a suitable mounting location, preparing the mounting surface, securely fastening the camera to the mount, and adjusting the camera angle to achieve the desired field of view. By paying attention to these details, you can create a robust surveillance system that effectively monitors your property and protects your home.
Mounting your Blink Outdoor camera provides numerous benefits, such as deterring potential intruders, capturing crucial evidence in case of an incident, and providing remote access to live video feeds through the Blink app. With the camera securely in place, you can have peace of mind knowing that your property is under constant surveillance, whether you’re at home or away.
The camera’s position and ensure that it remains securely mounted. Additionally, consider factors such as weather conditions and potential obstructions that may impact the camera’s performance, and make any necessary adjustments to maintain its functionality. By successfully mounting your Blink Outdoor camera, you are taking a proactive step towards safeguarding your home and loved ones. With its reliable performance and robust features, your camera will provide an added layer of security, offering you the confidence and reassurance you need in today’s fast-paced world.

